
8 Frequent Dishwasher Issues and Simple Solutions to Resolve Them
Dishwashers are a lifesaver in the kitchen, taking the hassle out of cleaning up after meals and saving valuable time every day. Yet, like any household appliance, they can develop problems over time. From dishes coming out dirty to water pooling at the bottom of the machine, these common dishwasher problems can quickly become frustrating if left unresolved. The good news? Many of these issues can be fixed without calling a technician. With a little troubleshooting and regular maintenance, homeowners can often restore their dishwasher’s performance in just a few simple steps. In this guide, we’ll explore eight frequent dishwasher issues and their practical solutions, helping you identify the problem and get your appliance running smoothly again. 1. Dishes Stay Dirty After a Wash Cycle It can be frustrating when a dishwasher completes its cycle, only for you to open the door and find plates, glasses, and cutlery still have grime on them.. When a dishwasher fails to clean dishes properly, the issue is usually caused by a few common and easily fixable factors. 2. Water Pools at the Bottom of the Dishwasher Finding standing water at the bottom of your dishwasher after a wash cycle is a common issue and usually points to a dishwasher drainage problem. When water doesn’t drain properly, it can leave behind unpleasant odors and affect the appliance’s overall performance. Fortunately, this problem is often caused by a few manageable factors that can be checked at home. 3. Water Leaks Out During Operation A dishwasher that leaks can create a mess and potentially harm your kitchen flooring if not fixed promptly. If you notice water pooling around the appliance during a wash cycle, it’s important to identify the source of the leak as soon as possible. Let’s identify the source: 4. Dishwasher Produces Excessive Noise While dishwashers aren’t whisper-quiet, they shouldn’t sound like a construction site. If your appliance begins making grinding, rattling, or humming noises, it may indicate a problem that needs attention. Identifying the cause early can help prevent further damage to internal components. 5. Dishwasher Refuses to Power On When a dishwasher won’t start at all, it can be frustrating and confusing. However, a dishwasher not turning on does not always mean the appliance is broken. In many cases, the problem can be traced back to simple electrical or operational issues. 6. Unpleasant Odors Emanate from the Dishwasher A dishwasher should leave your kitchen smelling clean, not unpleasant. If foul odors begin coming from the appliance, it is usually a sign of trapped food residue, stagnant water, or mold inside the machine. 7. Dishes Don’t Dry Properly After Washing If your dishes come out wet, forcing you to dry them by hand, your dishwasher isn’t doing its full job. Here’s what might be wrong: 8. Detergent Doesn’t Release During the Cycle When the dishwasher fails to dispense its cleaning agent, your dishes won’t get properly cleaned, which defeats the appliance’s purpose. This problem often relates to the detergent dispenser itself or how the dishwasher is loaded. Final Thoughts Keeping your dishwasher in good working order through regular upkeep and quick troubleshooting can save you time, effort, and expense. By identifying the causes of issues like poor cleaning, water leaks, or odd sounds, you can often resolve them on your own without expert intervention. For more complicated problems, though, don’t hesitate to seek professional assistance. At Big H & A Service, we specialize in Appliance Repair Services, handling everyday home appliances with unmatched expertise and experience, so you never have to bounce between multiple contractors for dishwasher repair again. With consistent care and attention, your dishwasher can remain a dependable part of your kitchen routine, helping you keep dishes clean and your daily cleanup simple for years to come. FAQs What is the most common problem with dishwashers? The most common dishwasher problem is dishes coming out dirty, often caused by clogged spray arms, a dirty filter, or improper loading that blocks water circulation. What is the average lifespan of a dishwasher? Most dishwashers last between 8 to 12 years, depending on usage, maintenance, and the quality of the appliance. How can I easily unclog a dishwasher? Start by cleaning the filter, spray arms, and drain hose. Removing food debris and flushing the drain line with warm water can often clear minor clogs. What is the average cost to repair a dishwasher? Dishwasher repairs typically range from $100 to $400, depending on the issue and the parts that need replacement. Can I fix my dishwasher myself? Yes, many common dishwasher problems, like clogged filters, blocked spray arms, or detergent dispenser issues, can often be fixed with simple troubleshooting at home.
10 Maintenance Tips to Avoid Rooftop Unit Breakdown
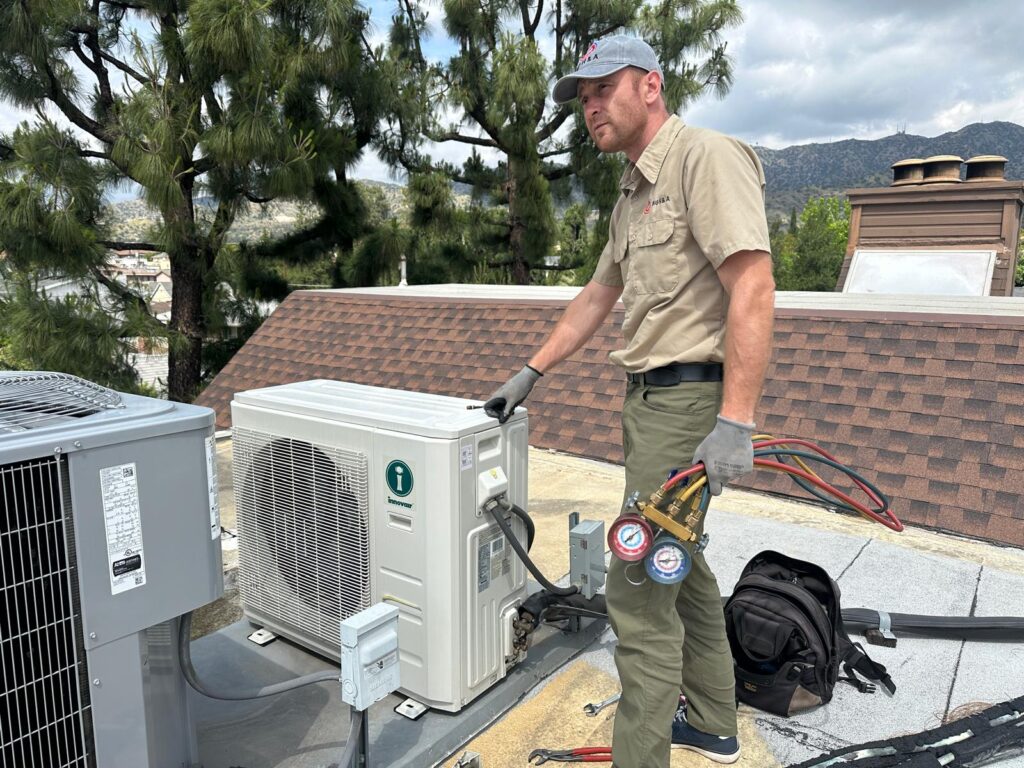
You walk past your building and notice the air conditioning isn’t keeping up. It’s warm inside, the system is running constantly, and you have no idea why. Up on the roof, your HVAC equipment has been working hard, but nobody’s been paying attention to it. Rooftop unit breakdown happens more often than it should. These systems sit out of sight, so they’re out of mind. But the weather doesn’t take a break. Rain, snow, heat, and debris all take a toll on the equipment up there. This guide covers ten rooftop unit maintenance tips that help you avoid unexpected failures. Because a breakdown on the hottest day of the year is the worst time to learn you should have called someone sooner. Why Rooftop HVAC Units Fail You can’t fix what you don’t understand. Knowing why these systems break down helps you prevent it. Why do rooftop HVAC units fail? The answer usually comes down to one thing. Neglect. They’re out of sight, so they get ignored until something stops working. Here are the most common causes: Cause What Happens How to Prevent Poor maintenance Small problems grow into big ones Follow a regular schedule Dirty filters and coils Airflow drops, system works harder Clean or replace on schedule Electrical issues Loose connections, failed components Inspect connections yearly Refrigerant problems Low levels or leaks reduce cooling Check pressure, fix leaks promptly Drainage blockages Water backs up, damages components Clear drain lines regularly Mechanical wear Belts, bearings, motors fail over time Lubricate and replace worn parts What causes rooftop HVAC system failure more than anything else is simple. Lack of attention. A rooftop unit that gets regular care can last 15 to 20 years. One that gets ignored might fail in half that time. Understanding Rooftop Unit Components Before you can maintain a system, you need to know what you’re looking at. A rooftop HVAC unit isn’t as complicated as it looks. It’s just a collection of parts that work together. Here are the main components you should know about: These rooftop unit components all depend on each other. One failing part puts stress on everything else. That’s why knowing the parts of a rooftop unit helps you understand what maintenance is actually doing. 10 Maintenance Tips to Avoid Rooftop Unit Breakdown Let’s get into the actual steps you can take. These ten tips will keep your system running and help you avoid costly surprises. Tip 1: Schedule Regular Rooftop HVAC Inspections You can’t fix what you don’t see. A professional rooftop HVAC inspection twice a year catches problems while they’re still small. Spring and fall are ideal. Once before cooling season, once before heating season. A trained technician knows what to look for and can spot issues you’d never notice. Tip 2: Replace or Clean Air Filters Frequently Dirty filters are the number one cause of airflow problems. When filters clog, your system works harder, runs longer, and cools less. Check them monthly. Replace disposable filters every one to three months. Clean washable filters when they look dirty. A clean filter is cheap insurance against bigger problems. Tip 3: Clean and Maintain Coils Dirty coils can’t transfer heat efficiently. The evaporator coil inside and the condenser coil outside both need attention. When they’re coated with dirt, your system loses efficiency. A technician will clean them during a professional tune-up. Between visits, keep the area around the outdoor unit clear of debris. Tip 4: Check Refrigerant Levels and Look for Leaks Your system needs the right amount of refrigerant to cool properly. Too little means poor performance and higher energy bills. Too much can damage the compressor. A technician checks refrigerant levels during a tune-up and looks for leaks. Don’t try this yourself. Handling refrigerants requires special certification and equipment. Tip 5: Inspect Electrical Connections and Wiring Loose connections cause voltage drops. Voltage drops cause motors to run hot. Hot motors fail. It’s a chain reaction that starts with something as simple as a loose screw. During rooftop unit maintenance, a technician tightens all electrical connections and checks for signs of overheating or damage. Tip 6: Maintain Drainage and Condensate Lines Your rooftop package units remove humidity from the air and that water has to go somewhere. The condensate drain line carries it away and when the line clogs, water backs up. It can damage your unit, your roof, and even your ceiling below. Pour a cup of vinegar down the drain line every few months to prevent algae buildup. A technician will check the line during each service visit. Tip 7: Lubricate Moving Parts Fans, motors, and bearings have moving parts that need lubrication. Without it, they create friction and friction creates heat, which in turn causes failure. A technician will lubricate these components during seasonal rooftop HVAC maintenance tasks. This simple step prevents wear and extends the life of your equipment. Most rooftop HVAC units have sealed bearings that don’t need lubrication, but older units require regular attention. Your service provider will know what your specific system needs. Tip 8: Inspect and Adjust Belts and Pulleys Belts connect motors to fans. Over time, they stretch, crack, and wear out. A loose belt slips and a slipping belt wastes energy and reduces airflow. A broken belt stops your system completely. During rooftop unit repair visits, technicians check belt tension and look for signs of wear. They’ll replace belts before they fail. This is one of those small things that makes a big difference in reliability. Tip 9: Calibrate Thermostat and Controls Your system is only as smart as the controls telling it what to do. A thermostat that reads the wrong temperature will make your system run too long or not long enough. Commercial rooftop HVAC system care includes checking thermostat calibration and testing all control sequences. A technician will make sure your system starts, runs, and shuts off exactly when it should. Tip 10: Keep the Rooftop Unit Clean and Free of Debris Leaves, dirt, bird nests, and
Why Your AC Cooling Drops After Running for a Few Minutes
You turn on the AC. Cold air blasts out. You feel that first wave of relief. Then, after a few minutes, the air gets warmer. The cooling stops. The unit keeps running, but nothing is happening. You’re left wondering what went wrong. If you’ve been dealing with an air conditioner cooling problem like this, you’re not alone. It’s one of the most frustrating issues homeowners face. Your system seems fine at first, then it just stops doing its job. This guide explains the common causes of AC losing cooling after running and walks you through what you can do about each one. What It Means When Your AC Cools Then Stops You turn the system on. Cold air flows. Then, after a few minutes, the cooling stops. The fan might still run, but the air coming out isn’t cold anymore. This pattern points to a specific type of AC malfunction. The system is trying to work, but something is interrupting the cooling process. It could be a safety switch shutting down the compressor, a frozen coil blocking airflow, or an electrical issue causing intermittent operation. What you’re experiencing is different from a system that never cools at all. Yours starts strong, which means the basic components are functional. The problem is that something fails after a short period of operation. Air conditioner cools then stops cooling is often a sign of overheating, freezing, or a sensor detecting something wrong. The good news is that these issues are usually diagnosable and fixable. Why Your AC Cooling Drops After a Few Minutes Several things can cause your AC to start strong then lose its cool. Let’s go through them one by one. Dirty Air Filter or Restricted Airflow Your AC needs air to move across the evaporator coil to do its job. When the air filter gets clogged with dust, that airflow gets blocked. The coil gets too cold, ice forms, and the system can’t cool anymore. This is one of the most common reasons for AC not cooling properly. A dirty filter is also the easiest fix. Check yours. If you can’t see light through it, replace it. Frozen Evaporator Coils When airflow is restricted or refrigerant levels are low, the evaporator coil can freeze up. Ice acts as an insulator. Once ice covers the coil, air can’t pass through to get cold. Your AC will run, but the air coming out will be warm. You might notice water pooling around the indoor unit as the ice melts. This is a clear sign you have a freeze up issue. Low Refrigerant or Refrigerant Leak Refrigerant is what makes the air cold. When levels drop due to a leak, the system can’t remove heat effectively. The coil may freeze. The compressor may overheat and shut down. AC running but not cooling is a classic symptom of low refrigerant. This isn’t a DIY fix. You’ll need a technician to find and repair the leak, then recharge the system. Dirty Outdoor Condenser Coil The outdoor unit releases heat picked up from inside your home. If the condenser coil is covered in dirt, grass, or debris, that heat can’t escape. The system overheats and a safety switch shuts down the compressor. A simple rinse with a garden hose can often fix this. Just make sure to turn off power to the unit first. Compressor Overheating The compressor is the heart of your AC. It pumps refrigerant through the system. When it gets too hot, a built in safety switch shuts it down to prevent permanent damage. This can happen for several reasons. Dirty coils, low refrigerant, a failing fan motor, or poor airflow can all cause the compressor to overheat. Why does my AC compressor shut off after 2-3 minutes? This is classic overheating behavior. The compressor runs for a short time, heats up, and the safety trips. After it cools, it may restart, only to repeat the cycle. Thermostat or Sensor Issues Your thermostat tells the system when to run and when to stop. If it’s miscalibrated or placed near a heat source, it might think the room is colder than it actually is. A bad temperature sensor inside the air handler can also cause problems. If the sensor reads the coil temperature incorrectly, it may shut down the system prematurely. Why does my AC stop cooling after few minutes? Sometimes the thermostat is the culprit, not the AC itself. Electrical or Capacitor Problems Capacitors store energy and help start the compressor and fans. When a capacitor fails, the compressor may try to start, fail, and then shut off. Loose wiring or a failing contactor can also cause intermittent operation. The system might run for a few minutes, lose power to the compressor, and then stop cooling while the fan keeps running. Oversized AC Unit This one is less common but worth mentioning. If your AC is too big for your home, it will cool the space too quickly and shut off. This is called short cycling. The system never runs long enough to remove humidity, so your home feels cold but clammy. Knowing how to fix short cycling air conditioner often starts with checking the unit size. If it’s oversized, replacement may be the only real fix. Understanding Short Cycling You’ve probably noticed your AC turning on and off more often than it should. This behavior has a name. Short cycling. Why does my AC turn on and off every 5 minutes? That’s short cycling in action. A normal cooling cycle should last 10 to 20 minutes. When your system runs for only a few minutes before shutting off, something is wrong. The problem when AC turns on and off every 10 minutes is that your home never really gets comfortable. The system starts, cools a small area, then stops before the rest of the house catches up. AC short cycling at night can be especially annoying. You fall asleep to the sound of the fan, then wake up sweating when it
How Often Should You Service Your AC? (Expert Guide for 2026)

You know that feeling. It’s the first real heat wave of the year. You flip the thermostat to cool, hear the system kick on, and wait. And wait. The air coming out of the vents is barely cool. Your house isn’t getting any cooler. And you’re left wondering if you should have done something sooner. If you’ve been asking yourself how often should you service your AC, you’re not alone. Most homeowners know AC maintenance matters. They just don’t know the right schedule. Once a year? Twice? Only when something breaks? This guide gives you a straight answer and breaks down exactly how often your system needs attention based on your home, your climate, and how you use it. How Often Should You Service Your AC? (Quick Expert Answer for 2026) Let’s get straight to the answer most people are looking for. For the average home with a standard central air system, professional AC maintenance should happen at least once a year. The ideal time is spring, before the heat arrives. That way your system is ready when you need it most. If you live in a hot climate where your AC runs 8 to 10 months out of the year, or if you have an older system, consider moving to bi-annual service. Spring and fall. One tune-up before summer, another after heavy use to catch any wear before it becomes a problem. How often should AC unit be serviced depends on a few key factors. Here’s a quick reference: Factor Recommended Frequency Standard home, moderate climate Once per year (spring) Hot climate (desert, humid subtropical) Twice per year (spring + fall) Older system (10+ years) Twice per year Heavy usage (runs most of the year) Twice per year Newer system, light usage Once per year Commercial or multi-unit building Quarterly or as recommended Is it necessary to service AC every year? For most homeowners, yes. Even if your system seems fine, small issues develop quietly. A dirty coil, a loose connection, a refrigerant level that’s slightly off. None of them announce themselves. But they all cost you money and shorten your system’s life. But if you are still wondering, “Should I get my AC serviced every year?”, think of it like an oil change for your car. You don’t wait for the engine to knock before changing the oil. You do it on schedule to prevent the knock from ever happening. What Determines Your AC Maintenance Schedule? The one-size-fits-all answer works for most people. But your actual schedule might need adjusting based on how you live and where you live. Usage Intensity A system that runs 12 hours a day wears faster than one that cycles on and off for a few hours. If your AC works hard, it needs more attention. Commercial AC maintenance often happens quarterly because those systems run constantly. Climate Hot, dusty environments take a toll on ACs. Sand and dust clog filters and coat coils. High humidity encourages mold in drain lines. In these conditions, annual AC maintenance isn’t enough. Twice a year is smarter. System Type Different systems have different needs. Central AC system maintenance focuses on ductwork and the outdoor unit. Mini split AC maintenance involves cleaning indoor head units and checking refrigerant lines. Ductless AC maintenance is similar but requires cleaning each individual unit. Window AC unit maintenance is simpler but still needs annual attention. System Age An older system needs closer monitoring. Components wear. Efficiency drops. What worked at 10 years needs more care at 15. Regular yearly AC maintenance catches issues before they become failures. Pets and Indoor Air Quality Homes with shedding pets fill filters faster. If you have allergies, you might already change filters monthly. That doesn’t replace professional service, but it does mean your system sees more debris. Your AC maintenance schedule should reflect your actual life, not just a calendar date. What Does Professional AC Maintenance Include? When you schedule professional service, you’re not paying someone to simply look at your unit. You’re paying for a thorough inspection and tune-up that addresses everything that could go wrong. Here’s what a proper Air conditioner maintenance service typically includes: Component What Gets Done Electrical connections Checked and tightened to prevent shorts and failures Capacitors and contactors Tested for wear; replaced if needed Condenser and evaporator coils Cleaned to improve heat transfer Refrigerant levels Checked; leaks identified and repaired Airflow Measured; ductwork inspected for restrictions Drain line Cleared of algae and debris Thermostat Calibrated for accurate temperature control Filters Replaced or cleaned Moving parts Lubricated to reduce wear The air conditioner maintenance checklist covers everything that affects efficiency and lifespan. A good technician doesn’t skip steps. They follow a process designed to catch problems before they become breakdowns. AC preventative maintenance is about spotting the small things. A refrigerant level that’s slightly low. A capacitor that’s testing weak. A drain line starting to clog. Fixed now, they’re minor. Ignored, they become mid-summer emergencies. A proper Air conditioner tune-up takes about an hour for a standard system. But it’s time well spent. Routine & DIY AC Maintenance: What You Should Do Between Services Professional service once or twice a year is essential. But what you do in between matters just as much. Routine AC maintenance doesn’t require tools or training. It’s about paying attention and handling the basics. AC DIY maintenance tasks you can handle safely: Maintenance of air conditioner systems starts with these simple habits. They’re not replacements for professional service. They’re complements that keep your system stable between visits. Signs Your AC Needs Immediate Service You don’t have to wait for a scheduled visit if something feels wrong. Your system will tell you when it needs attention. If you notice any of these, don’t put off calling for help: These signs don’t go away on their own. They get worse. AC maintenance isn’t just about scheduled visits. It’s about acting when your system sends a signal. The truth is, home air conditioner maintenance starts with paying
Beat the Heat: Your Guide to A/C Tune-Ups with Big H & A
Opening Story: The Heatwave Wake-Up Call It’s the middle of July, and the temperature outside won’t drop below 95°. Inside, the Smith family’s home feels just as uncomfortable. Their air conditioner — which hasn’t had professional maintenance in years — suddenly shuts off. And what started as weak airflow turns into a complete breakdown, leaving the house hot, restless, and frustratingly silent. The repair estimate comes in at $1,500. But the hardest part? It likely could have been prevented with a routine air conditioner tune-up. Small issues like dirty coils, low refrigerant, or worn electrical components often build up quietly over time. Without seasonal HVAC maintenance, those minor problems can turn into costly system failures. If you’ve ever delayed AC maintenance because “it’s still working,” you’re not alone. But as many homeowners discover during peak summer heat, waiting too long can be expensive. Let’s take a closer look at why a professional A/C tune-up isn’t just maintenance, it’s protection for your comfort, your budget, and your peace of mind. The Hidden Costs of Skipping A/C Maintenance Ignoring your air conditioner is like ignoring a ticking time bomb—it’s only a matter of time before it blows. Small issues, like a dirty filter or low refrigerant, can spiral into major problems. A clogged coil might force your A/C to work harder, spiking your energy bill by up to 25%. Worse, neglected systems can fail entirely, leaving you with repair costs in the hundreds or a replacement costing thousands. Beyond money, you’re risking your family’s comfort during brutal heatwaves. The solution? Regular AC maintenance catches these issues early, saving you cash and keeping your home a cool oasis. Don’t let neglect burn a hole in your wallet—act now to protect your A/C. How a Tune-Up Transforms Your A/C A professional A/C tune-up helps your cooling system run the way it was designed to — efficiently, reliably, and consistently. When your air conditioner receives proper maintenance, the difference is noticeable. Here’s what you gain: Take Sarah, a local homeowner, who booked a tune-up with Big H & A Service. Her energy bill dropped by $150 in the first summer, and her home stayed frosty. Ready to transform your A/C? A professional tune-up is the key to comfort and savings. What Happens During a Big H & A Tune-Up? When you book with Big H & A Service, you’re getting more than a quick fix, you’re getting a comprehensive A/C overhaul by licensed pros. Here’s what a typical tune-up includes: Big H & A’s EPA-certified technicians bring years of HVAC expertise, offering same-day service and free diagnostics. Our services come with a one-year warranty, and transparent pricing, ensuring you get no surprises. As one satisfied customer shared: “Big H & A had my A/C running like new in hours!” Want to experience this top-tier service? Contact Big H & A to schedule your tune-up today. Myth-Busting: Common A/C Maintenance Misconceptions Think your air conditioner doesn’t need a tune-up? Let’s clear up some common AC maintenance myths: Don’t let these misconceptions leave your home uncomfortable or your energy bills higher than necessary. Trust Big H & A’s licensed experts to deliver the maintenance your A/C needs to perform efficiently all summer long. Beyond the A/C: Keeping Your Home in Top Shape Your air conditioner isn’t the only appliance that benefits from regular care. A well-maintained home means all major appliances, from cooling systems to kitchen cooktops, operate efficiently and reliably. For example, regular cooktop inspections can prevent unexpected breakdowns during family dinners. Big H & A offers expert cooktop repair services to keep your appliances in top shape. To stay ahead: A little attention now keeps your home running smoothly. Explore Big H & A’s services to protect all your appliances. Your Next Step: Stay Cool with Big H & A A professional A/C tune-up is your secret weapon for a cool, comfortable summer. It slashes energy bills, prevents breakdowns, and keeps your home feeling like a breeze. With Big H & A Service, you get certified technicians, same-day solutions, and a customer-first approach that’s earned rave reviews. Don’t wait for a heatwave to expose your A/C’s weaknesses. Book your tune-up now and enjoy a frosty, stress-free home all season long. Contact Big H & A today—your cool oasis awaits! FAQs 1. What does an A/C tune-up include? A professional tune-up typically includes coil cleaning, refrigerant check, thermostat calibration, and an electrical inspection to ensure your system runs efficiently. 2. How much does a typical AC tune-up cost? Most homeowners can expect a routine A/C tune-up to cost significantly less than emergency repairs, often ranging between $100–$200 depending on system size and service scope. 3. Can I do my own AC tune-up? You can handle basic tasks like changing filters, but only licensed technicians can safely check refrigerant levels, inspect electrical components, and identify hidden issues. 4. How often should your AC be tuned up? For optimal performance, schedule a professional A/C tune-up at least once a year, ideally in spring before peak summer use. 5. How long does it take to do an AC tune-up? A full professional inspection and tune-up usually takes 60–90 minutes, depending on system size and condition.
Reliable Dryer Repair and Maintenance

Imagine tossing a full load of laundry into your dryer, expecting warm, fluffy clothes, only to pull out damp garments an hour later. Frustrating, right? Dryers are household heroes, making laundry faster and easier, but when they start acting up, failing to heat, not tumbling, or leaving clothes wet, they can throw off your entire routine and even pose safety risks if ignored. In this guide, we’ll walk you through the most typical dryer issues, share essential upkeep strategies, and highlight why turning to experts for repairs is often the wisest choice. Whether you own an LG, GE, Electrolux, Maytag, or Haier dryer, these insights will help keep your machine running smoothly for years to come. Typical Dryer Challenges to Watch For Even the best dryers can run into issues over time that affect their efficiency. Knowing the warning signs can save you stress, time, and even prevent safety hazards. Here are some of the most common problems homeowners face: Benefits of Choosing Expert Dryer Repair Services While it might be tempting to troubleshoot dryer issues on your own, these appliances have intricate electrical and mechanical systems that require specialized skills to fix safely. Skilled technicians can accurately identify the root cause and use premium components to ensure a durable solution. Safety is a major factor in opting for professional help. Dryers, particularly gas-powered models, can be hazardous if mishandled, with risks ranging from electrical shocks to potential gas leaks. Certified experts are trained to manage these dangers effectively. Additionally, professional services can be more cost-effective over time. Though the initial expense might seem higher upfront, addressing the core issue prevents further damage, saving you from pricier repairs down the line. Many professional dryer repairs also come with guarantees, offering confidence in the quality of the work. Understanding Challenges Across Popular Dryer Brands Every dryer brand has its own design quirks, which can lead to specific issues. Knowing what to watch for can help you catch problems early and keep your machine running smoothly. Here’s a quick guide for some of the most common brands: LG Dryers: Known for their smart features, these models sometimes face heating coil failures or sensor glitches. Keep an eye on uneven drying cycles or error codes on the display. GE Dryers: Valued for durability, GE dryers can overheat due to clogged air paths. Regular vent cleaning is key to avoiding performance issues. Electrolux Dryers: Electrolux dryers may experience drum support wear or control system errors. Strange noises or inconsistent drying are early warning signs. Maytag Dryers: Temperature controls can malfunction, which might cause clothes to overheat or remain damp. Monitor heat settings and test cycles periodically. Haier Dryers: Modern electronics and drum alignment can be a concern. Problems with drum alignment or electronic component failures may show up as unusual sounds or error codes. Technicians with brand-specific experience can provide targeted fixes, ensuring your dryer performs at its best and avoids recurring problems. Simple Dryer Maintenance Tips to Prevent Breakdowns Routine care is crucial to maintaining your dryer’s efficiency and avoiding unexpected breakdowns. Start by clearing the lint screen after every cycle—a blocked screen restricts airflow, making the dryer work harder and increasing the risk of overheating. Additionally, inspect and clean the exhaust system at least annually to prevent clogs that could affect performance and safety. Be mindful not to overfill the drum. Exceeding the recommended capacity puts undue pressure on the motor and other parts, accelerating wear. If you notice unusual odors, like a burnt or musty smell, investigate immediately, as this could indicate overheating or lint buildup inside the machine. Every few months, run a cleaning cycle using a natural solution like citric acid to remove residue and odors. These straightforward habits can significantly enhance your dryer’s longevity and keep it operating at peak performance. Final Thoughts A dependable dryer is more than just a time-saver—it’s a household essential. By staying aware of potential issues and committing to regular upkeep, you can prevent disruptions and ensure your appliance serves you well for years. When problems arise, relying on professional dryer repair services is the smartest way to restore functionality safely and efficiently. Don’t let dryer troubles linger—address them promptly with proper care and expert support. This approach not only saves you time and expense but also provides the assurance that your appliance is in capable hands, ready to tackle your laundry needs. FAQs 1. What is the average cost to fix a dryer? Repairs typically range from $100 to $300, depending on the issue and whether parts need replacement. 2. What is the most common problem with dryers? Lint buildup, heating failure, and drum issues are the most frequent causes of dryer malfunctions. 3. What is the average lifespan of a dryer? Most dryers last between 10 to 15 years with proper care and regular maintenance. 4. What brands of dryers are the most reliable? LG, GE, Maytag, and Electrolux are known for durability, though regular maintenance is key for all brands. 5. What are signs it’s time to replace a dryer? Persistent overheating, unusual noises, uneven drying, or repeated breakdowns indicate it may be time for a replacement.
Smart Air Conditioner Installation: Prices, Tips & What to Expect

Air Conditioner Installation: What It Costs, What to Expect, and How to Get It Right When the heat kicks in, a good air conditioner isn’t just a nice-to-have-it’s a must. But buying the right unit is only half the battle. What really matters is how it’s installed, because that is what affects how well it cools, how long it lasts, and how much you’ll pay on your energy bills. In this article, we’ll walk you through what to expect during AC installation, how much it might cost, and how to make sure the job’s done right. Types of Air Conditioners – Which One Do You Need? Not all air conditioners are created equal, and the right choice depends on your home, your cooling needs, and your budget. Here’s a quick breakdown of the most common types: The key is choosing the right size. If the system’s too big, it’ll cycle on and off too often, wasting energy and wearing out faster. Too small—and it won’t keep up with your cooling needs. A professional AC technician will look at things like room size, ceiling height, insulation, and number of windows before recommending a unit that perfectly fits your needs. How Much Does AC Installation Cost? Air conditioner installation costs can vary widely depending on the type of system, the complexity of your home, and any additional work required. To give you an idea, here’s a general breakdown: If you have an older home, unusual layout, or need extra work done, prices can be higher.Pro tip: Look for energy-efficient models with high SEER ratings. While they may cost more upfront, they can reduce your energy bills by up to 30% over time. And don’t forget to check for rebates or tax incentives in your city/state—many offer them for eco-friendly upgrades. Other costs to keep in mind: Why You Should Leave It to the Pros Sure, DIY AC installation might sound cheaper, thinking you might save a few dollars—but with air conditioners, mistakes can be expensive (or even dangerous). Here’s what can go wrong: Our technicians are fully trained, licensed, and certified. From measuring your space accurately to safely wiring and setting up your system, we do it all by the book. And if something comes up later, you know who to call. Already have a unit but it’s acting up? Check out our A/C repair services. Getting Ready for Installation — Simple Tips Want your air conditioner installation to go smoothly? A little preparation can save time, reduce stress, and ensure your new system works perfectly from day one. Here’s how to get ready: Bonus tip: Schedule your installation in the spring or fall. It’s usually less busy, and you might save a bit on labor costs. Time for a New System? Sometimes, air conditioner replacement is smarter than repairing it repeatedly. If your current A/C is always giving you trouble, it may be time for something new. Watch out for these signs: And remember, if your A/C is failing, your furnace might not be far behind. Want to be sure? Check out our furnace repair page to ensure your whole home stays comfortable year-round. Final Thoughts Installing an air conditioning system isn’t just about keeping cool for the summer. It’s about investing in your everyday comfort, protecting your home, and avoiding future headaches. A poorly installed AC unit can cost you thousands in energy waste and repairs—not to mention the stress of dealing with unexpected breakdowns when you need cooling the most. When you work with experienced professionals at Big H & A Service, you’re not just getting someone to bolt a unit to the wall. You’re getting: In short, proper installation means better comfort, fewer problems, and lower bills. It’s the kind of decision you make once and benefit from for years. At BigHa Service, we treat every home like it’s our own. We listen, explain things clearly, and never cut corners — because we know that trust is earned, not assumed. So if you’re ready for cool air, clear answers, and a stress-free install — give us a call or book online. We’ll take care of the rest. FAQs 1. What is the average cost of AC installation? Central systems usually start around $5,000, mini-splits around $1,500+, and window or wall units under $500, depending on home layout and complexity. 2. What is included in AC installation? Professional installation covers sizing the unit, mounting, wiring, refrigerant setup, and system testing to ensure efficient performance. 3. What’s the best time of year to install an AC? Spring or fall are ideal—HVAC companies are less busy, and you may save on labor costs. 4. How long does it take a professional to install an AC unit? Installation typically takes a few hours for a single unit; larger or multi-zone systems may take a full day or more. 5. Do you need a professional to install an AC unit? Yes. Professionals ensure safe, code-compliant installation, proper sizing, and warranty protection, preventing costly mistakes.
Essential Air Conditioner Repair Tips, Costs & When to Call a Pro

A/C Not Working Right? Here’s What to Check, What It’ll Cost, and When to Call for Air Conditioner Repair When your air conditioner starts acting up – barely cooling, making strange noises, or refusing to turn on – it can turn a normal day into a frustrating, overheated mess. And during a heatwave, it’s more than inconvenient since it costs your sleep, your comfort, and your peace of mind. The good news? Not every issue requires expensive air conditioner repair. Some problems are minor and easy to troubleshoot, while others need a licensed AC repair technician to prevent bigger (and costlier) damage. In this guide, we’ll walk you through the most common air conditioner repair problems, what you can safely check yourself, typical AC repair costs, and when it’s time to call in a professional. What Typically Goes Wrong (and What It Looks Like) Air conditioners are built to last, but like any system, they can break down-especially if they’re running non-stop during summer and regular maintenance has been skipped. Here are the most common air conditioner repair issues we see, and what they typically look like: It Blows Air, But It’s Not Cold If your AC is running but not cooling, the issue could be low refrigerant levels, a clogged air filter restricting airflow, or a failing compressor. In some cases, it may also be a thermostat setting problem. Water Is Leaking From the Unit If you notice water pooling around the indoor unit, especially after shutting it off, the most likely cause is a clogged condensate drain line. In some cases, improper installation or an unlevel unit can also cause drainage issues. It’s Noisy-Rattling, Clicking, or Humming Air conditioners shouldn’t make loud or unusual noises. Rattling can mean loose components. Clicking might indicate electrical issues. A persistent humming sound could signal a failing fan motor or worn bearings. It Won’t Turn On at All Before assuming the worst, check your circuit breaker and power supply. A tripped breaker is usually the most common and simple fix. However, if the unit still won’t power on, the issue could be a damaged circuit board, faulty capacitor, or an overheated system that has shut itself down for safety. At that point, professional air conditioner repair is the safest option. True story: A customer recently called saying their AC “just doesn’t work like it used to.” After a quick inspection, we discovered it was simply set to “fan” mode – meaning it was blowing air without cooling. The fix took less than 30 seconds and didn’t require a single tool. How Much Does Air Conditioner Repair Cost? One of the first questions homeowners ask is: “How much is this going to cost me?” The truth is, air conditioner repair costs vary depending on the issue, the brand of your system, the availability of parts, and how long the problem has been left untreated. But here’s what you can expect: Repair Type Estimated Cost Refrigerant recharge $80–$250 Deep cleaning (indoor unit) $100–$200 Circuit board replacement $200–$600 Fan motor repair $150–$400 Pro tip: If your unit is over 12 years old and the repair costs nearly as much as a new system, it’s probably time to upgrade. We’ll help you weigh the options so you don’t waste money on short-term fixes. 5 Things to Check Before Calling for AC Repair Before you assume the worst, take a few minutes to run through these quick checks. Many air conditioner repair calls turn out to be simple fixes that homeowners can handle themselves. If you’ve run through this list and it’s still not cooling, it’s time to bring in an AC technician. When It’s Time to Call a Professional AC Repair Technician While some issues are simple, others should never be ignored. Waiting too long can turn a manageable air conditioner repair into a major system failure, especially during peak summer months when your unit is under constant strain. Here are the signs it’s best not to wait and call a licensed AC repair technician right away: Important: Don’t try opening the unit or attempting to repair electrical or refrigerant components yourself. Not only can it be dangerous, but it may also void your manufacturer’s warranty. And remember-during peak summer months, good HVAC pros get booked fast. Better to get on the schedule early than suffer through a heatwave. How to Keep Your A/C From Breaking Again The best way to lower your air conditioner repair cost is simple: prevent breakdowns before they happen. A few small habits can extend the life of your system and save you hundreds, sometimes thousands, in avoidable repairs. Here’s what we recommend: And if your system connects with a furnace or ductwork, don’t forget that issues can overlap. Fix Your AC Before It Gets Worse Let’s sum it up. If your air conditioner isn’t cooling properly, leaking water, making unusual noises, or refusing to turn on, it’s not something to brush off. Small issues rarely fix themselves – and the longer they’re ignored, the more expensive air conditioner repair tends to become. Before calling for help, it’s smart to check the basics: power supply, thermostat settings, remote batteries, and filter condition. Sometimes the fix really is that simple. But if those steps don’t solve the problem, don’t keep running a struggling system hoping it improves. That’s how minor repairs turn into major replacements. When in doubt, contact a licensed AC repair technician who can accurately diagnose the issue and recommend the right solution. A professional doesn’t just fix what’s broken – they help protect the lifespan of your entire system and make sure it’s operating safely and efficiently. Want to avoid unexpected breakdowns in the future? Stay consistent with filter changes, schedule annual maintenance, and pay attention to small performance changes before they grow. Preventive care will always cost less than emergency air conditioner repair. If you’re sweating while your air conditioner struggles to keep up, don’t wait for the problem to get worse. Give us a call and
Air Conditioner Maintenance in Burbank, What It Includes, and Why It Matters

In Burbank’s hot, dry climate, your A/C isn’t just a luxury-it’s a necessity. And just like your car, it needs regular maintenance to keep running smoothly. Without it, your system may struggle to cool properly, cost you more on your energy bills, and eventually break down when you need it most. In this article, we’ll explain why A/C maintenance is especially important in Burbank, what’s included in a proper tune-up, how often to do it, and how it helps save money long-term. Why A/C Maintenance Is a Must in Burbank In Burbank, the sun doesn’t take a day off, and neither does your A/C. When temperatures soar, your system works overtime to keep your home cool, and that extra effort can take a toll if it isn’t maintained regularly. Skipping routine maintenance can lead to: We had one customer report weak airflow. Turns out the drainage line was clogged and the filters hadn’t been cleaned in over two years. A professional tune-up got their system back to peak performance-no expensive repairs required. What’s Included in a Professional A/C Tune-Up A proper A/C tune-up is more than just “dusting off the unit”. When done right, it includes a full inspection and performance check. And that is exactly what our certified technicians do, performing a thorough inspection to make sure every component is working at its best. Here’s what a typical A/C maintenance visit includes: Signs Your A/C Needs Maintenance You don’t have to wait for a full breakdown to call a professional. Catching small issues early can save you time, money, and stress. If your A/C is showing any of these signs, it’s time to schedule an AC check-up: Even a small issue, like a dirty filter, can snowball into a bigger repair if left unchecked. Regular professional A/C maintenance in Burbank ensures your system stays reliable and your home stays comfortably cool. How Often Should You Service Your A/C in Burbank? In Burbank, where the sun shines for months at a stretch, your A/C works harder than in milder climates. That’s why regular tune-ups are needed to keep it running efficiently. Most homeowners in Burbank should schedule maintenance once a year, ideally in the spring-before the first major heat wave. This timing makes sure your system is ready for long summer days without surprises. If your A/C runs every day or if you manage a commercial space, consider scheduling maintenance twice a year; spring and fall. Regular inspections not only improve cooling performance but can also extend your system’s lifespan by 3–5 years, prevent emergency breakdowns, and save money on energy bills. Is Maintenance Cheaper Than Repairs? (Short Answer: Yes) Some people wait until their system fails before they call. But here’s what that usually costs: Service Type Average Price Maintenance tune-up $120–180 Emergency repair $250–700 Full system replacement $2,000+ A yearly Burbank A/C maintenance visit is not only cheaper, it can actually prevent costly repairs and extend the life of your system. Plus, it keeps your energy bills in check. If your system is already showing signs of trouble, make sure to check out our A/C repair service. Why Burbank Homeowners Trust Our A/C Services When it comes to keeping your home cool, homeowners want a team they can count on. Here’s why our clients choose us time and again: Ready to book your appointment? Don’t Wait for the Heat – Get Your A/C Ready Now A broken A/C in the middle of summer isn’t just uncomfortable, it can be a real health risk, especially for kids, seniors, or anyone sensitive to heat. One quick professional A/C maintenance now can prevent costly emergency repairs down the line, keep your energy bills low, and ensure your home stays cool all season long. Take care of your A/C and it’ll take care of you. Book your Burbank A/C tune-up today and stay cool, comfortable, and worry-free this summer. FAQS 1. How much does it cost to have an air conditioning unit serviced in Burbank? A professional A/C tune-up in Burbank typically costs $120–$180, depending on your system’s size and condition. 2. How often should I have my A/C serviced? Most homeowners should schedule maintenance once a year, ideally in spring. Systems used daily or in commercial spaces may benefit from twice-yearly service. 3. What does A/C maintenance include? A full service usually covers filter cleaning/replacement, checking refrigerant levels, inspecting wiring, testing airflow and temperature, and cleaning the outdoor unit. 4. Can I service my A/C myself? Basic tasks like cleaning filters are possible, but professional maintenance ensures all components are checked and system efficiency is optimized. 5. What are signs my A/C needs maintenance? Look for weak airflow, higher energy bills, strange noises or odors, and water leaks-these often indicate your system needs a tune-up.
Mini-Split Repair in Santa Monica: Common Issues, Costs & When to Call a Pro
Mini-split systems are a favorite in Santa Monica, and it’s easy to see why. They’re quiet, energy-efficient, and don’t require the hassle of ductwork. But living by the coast comes with unique challenges, and even the most reliable mini-splits can face issues over time. Whether you’re enjoying ocean breezes near the Santa Monica Pier or the sunny streets of Ocean Park, understanding why your mini-split needs repairs is the first step to keeping your home cool, comfortable, and energy-efficient all year round. In this guide, we’ll break down why mini-splits break down, what the most common problems are, how much repairs usually cost, and when it’s time to bring in a certified technician. Why Mini-Splits Break Down in Santa Monica Santa Monica’s beautiful oceanfront location comes with a hidden downside—your HVAC system is constantly exposed to environmental factors that quietly wear it down. The salty ocean breeze, while refreshing, accelerates corrosion on the metal components of your outdoor unit, especially if it isn’t regularly cleaned or protected with anti-corrosive coatings. Over time, this can lead to refrigerant leaks, sensor failures, or fan motor damage. Humidity & moisture buildup plays another role. Coastal air carries moisture that can accumulate inside your mini-split system. Without proper drainage and airflow, mold and mildew can develop, clogging filters or internal parts and impacting air quality. Dust, pollen, and salt particles also settle into delicate electrical boards and coils. Temperature swings are another culprit. Santa Monica may not have extreme winters, but day-to-night shifts of 20+ degrees are common. These fluctuations force your system to cycle more frequently, wearing out components faster, especially if your mini-split is undersized, poorly installed, or overdue for maintenance. The Most Common Mini-Split Problems We Fix Mini-splits are efficient, but they’re not invincible. The issues we see most often in Santa Monica homes range from minor annoyances to major system failures. For example, weak airflow could mean dirty filters, but it could also indicate a blocked evaporator coil or a failing blower motor. If the system turns on but doesn’t cool, you might be dealing with a refrigerant leak, a damaged compressor, or a faulty reversing valve. Water leaking from the indoor unit usually points to a clogged drainage line or improper tilt during installation. And if your remote or control panel isn’t responding, the issue might be as simple as dead batteries—or as complex as a failed main board. Odors, noises, and flashing LED codes shouldn’t be ignored either. Musty smells often indicate mold in the drain pan or filters. Clicking, buzzing, or rattling could mean loose parts, fan damage, or electrical arcing. And LED codes? They’re your system’s way of asking for help—and we know how to interpret them accurately. How Much Does Mini-Split Repair Cost in Santa Monica? Repair costs depend on the type of issue, the age and brand of your system, and how quickly you need it fixed. In most cases, we start with a flat diagnostic fee that’s credited toward any repair work you choose to approve. Simple fixes, like clearing a clogged drain or replacing a capacitor, can run between $150 and $300. More complex repairs, such as a control board replacement or refrigerant recharge, might cost $400 to $700. Major repairs involving compressors or coils can exceed $800. Brands also matter. Premium systems like Mitsubishi and Daikin may require OEM parts and certified technicians, which can increase cost slightly—but the benefit is longer-lasting performance and valid warranty coverage. The good news? Catching a problem early almost always saves money. And if your system is still under warranty, we’ll help you handle the paperwork to minimize your out-of-pocket cost. What You Can Try Before Calling for Help Not every A/C issue requires a service call. If your mini-split isn’t working right, try these simple steps first: These steps often resolve basic issues. But if your system continues to leak, make strange noises, or flash error codes, it’s time to schedule a professional AC inspection. Why DIY Repairs Aren’t Worth the Risk Mini-splits may look simple on the outside, but under the cover, they’re complex machines. Modern models include pressure sensors, inverter control boards, thermistors, and precise refrigerant balance systems. One wrong move, and you could cause more harm than good. Opening the unit yourself can void the manufacturer’s warranty, especially if you tamper with sealed components. Accidentally overcharging refrigerants can damage the compressor. Incorrect wiring can lead to short circuits, or worse, safety hazards. Even cleaning the coils with the wrong product can corrode sensitive parts. That’s why we always recommend letting certified professionals handle diagnostics and repairs. Our licensed technicians use the right tools, follow safety protocols, and fix it right the first time, all with warranty support included. Why Santa Monica Homeowners Trust Us We’re not just another HVAC company. We live and work in the same neighborhoods you do. We understand the specific challenges that Santa Monica homeowners face—older buildings, salt air, space constraints, and unique zoning needs. Our team has deep experience with all major ductless brands and models. Whether it’s a wall-mounted Mitsubishi system or a floor-level LG unit, we know how to get it back up and running. We believe in honesty, fast turnaround times, and clean job sites. Our pricing is always transparent. No “trip fees” or surprise charges. Just experienced techs, real answers, and lasting repairs. FAQs 1. How much does it cost to repair a mini-split? Minor repairs like clearing a drain or replacing a capacitor usually cost $150–$300. Major repairs, including compressors or coils, can exceed $800. 2. Are mini-splits worth repairing? Yes. If the system is under warranty or the repair is less than the cost of a new unit, repairing a mini-split can extend its life and maintain efficiency. 3. What is the average lifespan of a mini-split? With proper maintenance, mini-splits typically last 12–15 years, though coastal conditions in Santa Monica may shorten lifespan without regular care. 4. What is the most expensive mini-split repair? Replacing the compressor or