
Crown Heights, Bed-Stuy & Park Slope: Which Brooklyn Neighborhoods Have the Most LPC-Protected Buildings?

You walk through Brooklyn and notice something about the buildings. They feel solid, permanent, like they’ve been there forever. Some of them have plaques. Others just have that look, the kind of architecture they don’t build anymore. Here’s a number that might surprise you. Brooklyn has over 30,000 buildings protected by the Landmarks Preservation Commission. That’s more than most American cities have total. And three neighborhoods carry most of that weight. This guide breaks down the numbers for Crown Heights, Bed-Stuy, and Park Slope. We’ll look at which has the most NYC historic buildings, what styles define them, and why it matters. Overview of LPC and Historical Preservation in NYC Before we compare neighborhoods, it helps to understand who’s doing the protecting. The NYC landmarks preservation commission was created in 1965 after the destruction of Penn Station. The city realized that without rules, its architectural history would keep disappearing. Today, the LPC oversees more than 38,000 landmark properties across all five boroughs. Brooklyn historic districts make up a huge portion of that total. The commission reviews changes to these districts to make sure new work respects what’s already there. That’s why knowing if your building is in a historic district matters for renovations. The NYC LPC map is the easiest way to check a property’s status. You can zoom into any Brooklyn neighborhood and see exactly which blocks are protected. It’s a tool every brownstone owner should bookmark. Historical landmarks NYC aren’t just about old buildings. They’re about preserving the character that makes neighborhoods feel like home. Park Slope feels like Park Slope because its row houses look the way they did a century ago. Bed-Stuy’s streets tell the story of Black history and culture through their architecture. Protecting these districts means protecting what makes Brooklyn Brooklyn. At a Glance: Brooklyn’s Historic Districts by the Map If you want to understand where preservation happens in Brooklyn, start with a map. Here’s what you’ll find when you look. Park Slope Brooklyn Heights Crown Heights & Bed-Stuy The NYC LPC map ties it all together. Zoom in, click around, and see exactly which blocks are protected. It’s the same tool professionals use, and it’s free. Neighborhood-by-Neighborhood Analysis Now let’s get into the specifics. Each of these three neighborhoods tells a different story about preservation in Brooklyn. Park Slope Park Slope isn’t just a neighborhood with a lot of landmarked buildings. It’s one of the largest historic districts in all of New York City. The numbers tell the story. The original Park Slope Historic District was designated in 1973 and included 1,948 buildings. That alone would put it near the top of any list. But two major expansions followed. The Park Slope historic district extension in 2012 added 613 buildings. Another extension in 2016 added 292 more. Add it all up and you get 2,853 protected buildings in a single neighborhood. Architecturally, Park Slope is famous for its diversity. You’ll find Neo-Grec row houses with their incised geometric patterns. Romanesque Revival buildings with heavy stone arches. Queen Anne homes with intricate detailing and asymmetrical facades. And along Prospect Park West, the so-called “Gold Coast” mansions stand as monuments to 19th-century wealth. The Park Slope historic district designation report documents all of this in detail. It’s the official record of why each block deserves protection. For anyone interested in Brooklyn architecture, it’s worth a read. Bedford-Stuyvesant Bed-Stuy tells a different story than Park Slope. Its landmark districts came later, grew more gradually, and carry cultural weight that goes beyond architecture. The numbers put Bed-Stuy solidly in the conversation. Across several districts, the neighborhood has approximately 1,800 protected buildings. That’s fewer than Park Slope but still an impressive total. The Brooklyn historic districts in Bed-Stuy include: Architecturally, Bed-Stuy is known for its late-Victorian row houses. The detailing is often more elaborate than what you’ll find in other neighborhoods. Intricate cornices, carved stone lintels, and ornate ironwork are everywhere you look. But the cultural significance runs deeper. Bed-Stuy has long been a center of Black history and culture in New York. The Historical landmarks NYC designation process here has explicitly focused on equity, protecting areas that reflect the heritage of communities often overlooked in earlier preservation efforts. Recent LPC actions in Bed-Stuy reflect this priority. The Willoughby-Hart district designation in 2024 wasn’t just about architecture. It was about recognizing the neighborhoods where Black families built homes, raised children, and created communities despite decades of systemic challenges. Crown Heights Crown Heights rounds out the trio with a distinctive architectural identity all its own. Its protected buildings cluster in the northern part of the neighborhood, north of Eastern Parkway. The numbers here are substantial. Crown Heights has approximately 1,752 landmarked buildings across several districts. That puts it right in line with Bed-Stuy, just a few dozen buildings behind. The Brooklyn historic districts in Crown Heights break down like this: Architecturally, Crown Heights stands out for its “Kinko-style” houses. These are two-family homes with separate entrances, designed to accommodate extended families or rental income. They’re unique to this part of Brooklyn and you won’t find them in the same concentration anywhere else. What’s interesting about Crown Heights is how its districts grew over time. The three phases of Crown Heights North show preservation in action. Each extension added buildings that met the architectural standards, slowly expanding protection outward from the core. Walking through Crown Heights today, you see blocks of beautifully maintained row houses alongside those distinctive Kinko-style homes. It’s a neighborhood that feels cohesive without being uniform, protected without being frozen in time. Comparative Analysis: Which Neighborhood Leads? Now for the question you came here to answer. Which Brooklyn neighborhood has the most LPC-protected buildings? The short answer is Park Slope. By a significant margin. Neighborhood Total Protected Buildings Key Districts Park Slope 2,853 Original district (1973) + 2012 extension + 2016 extension Bedford-Stuyvesant 1,800 Bedford, Stuyvesant Heights, Willoughby-Hart Crown Heights 1,752 Crown Heights North I, II, III + Park Place Park Slope’s total is nearly a
Common Oven and Stove Problems: Causes, Fixes, and Maintenance Tips
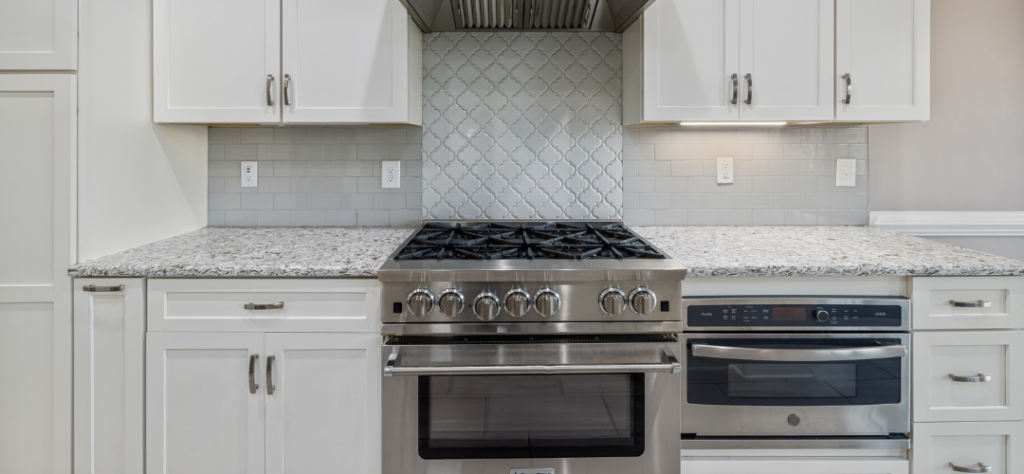
Your kitchen relies heavily on a dependable stove and oven to craft everything from savory dinners to delectable desserts. Yet, over time, these essential devices can face wear, leading to issues like inconsistent temperatures, burners that fail to ignite, or digital displays showing error messages. Such disruptions can throw a wrench into your cooking plans. This article dives into frequent challenges, specific brand considerations, and the value of expert maintenance while offering practical tips to keep your appliances running smoothly. Common Oven and Stove Problems and Their Causes Ovens and stoves are essential kitchen appliances, but over time, they can develop issues that affect performance, safety, and efficiency. Understanding these common problems can help you identify when your appliance needs attention and prevent further damage. Oven Not Reaching the Desired Temperature A common issue many homeowners face is an oven that fails to heat properly. This can lead to undercooked or unevenly cooked food, making it difficult to rely on your appliance for consistent results. This problem is often caused by a worn-out heating element or a malfunctioning temperature sensor or thermostat. When these components fail, the oven cannot accurately regulate heat, resulting in poor cooking performance. Uneven Cooking or Inconsistent Heat Distribution Another frequent problem is uneven cooking, where some parts of the food cook faster than others. This can be frustrating, especially when baking or roasting. This issue is usually linked to a faulty convection fan, a damaged heating element, or a malfunctioning internal sensor. These components are responsible for distributing heat evenly throughout the oven, and any disruption can lead to inconsistent results. Gas Burner Not Igniting Properly For gas stoves, one of the most common issues is a burner that won’t light. This can make cooking difficult and inconvenient, especially if multiple burners are affected. The cause is often blocked burner ports due to grease or food buildup. In other cases, the ignition system may be faulty and unable to produce the spark needed to light the burner. Gas Smell or Potential Leak If you notice a gas smell while using your stove, this is a serious issue that should never be ignored. It can indicate a possible gas leak, which poses both performance and safety risks. This could be due to a loose connection, damaged gas line, or faulty valve. If you detect this issue, it is important to stop using the appliance immediately and seek professional help. Error Codes or Display Malfunctions Modern ovens often come with digital controls and display panels that can show error codes when something is wrong. While helpful, these codes can be confusing without proper knowledge. These errors are typically caused by issues with the control board, sensors, or wiring. Diagnosing and fixing these problems usually requires professional tools and expertise. Brand-Specific Oven and Stove Problems and Maintenance Different oven and stove brands are designed with unique features, technologies, and performance standards. While this improves efficiency and functionality, it also means that each brand may experience specific issues over time. Understanding these differences can help with proper maintenance and timely repair. Viking Oven and Stove Repair Considerations Viking appliances are known for their premium build quality and professional-grade performance. However, their advanced systems require specialized care when issues arise. Common problems may include ignition issues, uneven heating, or control system malfunctions. Because of their complex design, Viking appliances often need experienced technicians and brand-specific parts to ensure proper repair and long-term performance. Whirlpool Oven and Stove Issues Whirlpool appliances are widely used for their durability and reliability. Over time, however, they may experience issues related to temperature sensors or heating elements. These problems can result in inaccurate cooking temperatures or inconsistent heating. Fortunately, most Whirlpool oven issues can be resolved efficiently with proper inspection and replacement of faulty components. GE Oven and Stove Troubleshooting GE appliances are known for their reliability and user-friendly design, but they can still develop common issues such as control panel malfunctions or burner problems. Over time, wear and electrical issues may affect performance. Regular maintenance and timely repairs can help prevent more serious breakdowns and extend the life of your GE appliance. Wolf Oven and Stove Maintenance Wolf is a high-end brand that incorporates advanced cooking technology and precision performance. However, this also means that repairs can be more complex. Issues with temperature accuracy, control systems, or internal sensors may require specialized expertise. Technicians familiar with Wolf appliances are often needed to properly diagnose and repair these systems without affecting performance. Why Professional Oven and Stove Maintenance is Important While fixing your oven or stove on your own might seem appealing, these appliances involve intricate electrical and gas systems that can be hazardous without proper training. Attempting repairs without expertise can lead to safety risks or further damage. Professional maintenance ensures precise identification of the problem and the use of high-quality, compatible parts for lasting results. Safety is especially critical with gas-powered appliances. Certified specialists not only address the issue but also verify that your device adheres to safety standards. Additionally, professional services often include guarantees, giving you confidence that the work is done correctly. For other kitchen appliance needs, such as keeping your fridge in top shape, check out our refrigerator repair services to ensure all your kitchen essentials are running smoothly. Simple Oven and Stove Maintenance Tips to Avoid Repairs Regular maintenance is one of the best ways to keep your oven and stove working efficiently and to avoid unnecessary repairs. With consistent care, you can improve performance, enhance safety, and extend the lifespan of your appliances. Clean Your Oven and Stove Regularly Keeping your oven and stove clean is essential for proper performance. Grease, food spills, and residue can build up over time and affect heating efficiency, create unpleasant odors, and even become a fire hazard. Make it a habit to wipe down surfaces after each use and perform a deeper cleaning periodically. Pay special attention to burners, oven racks, and the interior to ensure everything continues to function smoothly.
What Happens If You Skip HVAC Maintenance for 1 Year?

You come home on the hottest day of July, and the thermostat reads 78 degrees. You lower it to 72. Nothing happens. You lower it again. Still nothing. That sound you hear isn’t your AC kicking in, but it’s your wallet starting to cry. Maybe you’ve caught yourself wondering what happens if I avoid HVAC maintenance just for one season. A year, even. How bad could it really be? The filter still looks fine and the system turns on when you ask it to. But what most homeowners don’t realize until it’s too late is that HVAC maintenance isn’t about fixing what’s broken. It’s about stopping things from breaking in the first place. After twelve months of neglect, small problems don’t stay small. And by the time you feel the difference in your comfort, the bill for repairs has already tripled. So let’s walk through exactly what happens inside your system when you skip that annual HVAC maintenance. What Actually Happens If You Skip HVAC Maintenance for 1 Year Let us break down what twelve months of neglect actually does to your system. It is not one big disaster. It is death by a thousand small cuts. Your System Starts Lying To You The thermostat says 72 degrees, but the living room feels like a swamp. That is one of the first HVAC performance issues you will notice. Dirty filters and clogged coils restrict airflow. Your system runs longer to hit the temperature you want, but the air coming out of those vents is barely cool. You end up lowering the thermostat again and again, asking for more than your poor AC can give. Everything Works Harder Than It Should Here is what skipping HVAC maintenance looks like inside your walls. The blower motor strains against a filthy filter. The evaporator coil gets wrapped in dust, which acts like a blanket trapping heat instead of releasing it. Your system was designed to run in cycles, on for fifteen minutes, off for twenty. After a year without service? It runs constantly. And constant running means constant wear. Small Problems Become Expensive Ones That tiny refrigerant leak you did not know about? It does not heal itself. It gets bigger. That loose electrical connection that started as a minor vibration? Now it is a fire risk. Can HVAC break down without maintenance? Absolutely. And it almost always happens on the worst possible day, like during a heatwave or the first freeze of winter. Your Comfort Disappears Gradually You might not notice the decline at first. Maybe last summer you felt perfectly fine at 74 degrees. Now you need it at 70 to feel the same. That is your system losing efficiency right in front of you, and you are just adjusting to the new normal. But your energy bill does not adjust. It climbs. Energy Efficiency Drops and Utility Bills Increase Here is where the skip really starts to hurt your wallet. Why Your Bills Creep Up Without You Noticing A well tuned system cycles on and off. It reaches the temperature you set, then rests. But when maintenance of HVAC gets ignored for a full year, that rhythm falls apart. Clogged coils and dirty filters force your unit to run longer cycles. Sometimes twice as long. You are paying for two hours of cooling but only getting one hour’s worth of comfort. Think of it like a car with low tire pressure. You are still driving to work, but your engine works harder and burns more gas. Same distance, higher cost. Your HVAC does the same thing. The Math You Do Not Want To Do Let us say your energy bill jumps by 20 percent after a year of no service. That might only be $40 or $50 a month at first. But over twelve months? You just spent an extra $500 to $600 for worse cooling. That is money that could have paid for several years of tune ups. So does HVAC maintenance improve efficiency? Yes. Without question. A clean system runs the way the manufacturer designed it to run. A dirty system fights itself every single minute it is on. The difference shows up on your bill every month until you finally call someone. Hidden Damage, Wear, Tear, and Costly Repairs You cannot see what is happening inside your HVAC system. That is what makes it dangerous. The Quiet Breakdown After a year without service, small issues become big ones. A fan motor running against resistance starts overheating. Electrical connections loosen from vibration. The compressor, the most expensive part of your whole system, works harder every single day. What are the risks of not maintaining HVAC system? Here is the short answer. Parts fail earlier than they should. A bearing that could have lasted five years dies in three. A capacitor that costs fifty dollars to replace takes down a three hundred dollar fan motor with it. The Emergency Repair Tax When your system finally quits, it will not be on a mild Tuesday in spring. It will be on a Sunday in August or Christmas Eve. and just so you know, emergency HVAC repairs cost more. Much more. And you will be stuck waiting while sweating or freezing. That is the real cost of skipping. Not the repair itself. The panic that comes with it. Impact on HVAC System Lifespan Your HVAC system is not cheap. You probably already know that. A well maintained system lives 15 to 20 years. That is the number manufacturers design for. But here is the catch. That lifespan assumes you actually take care of it. So how long can HVAC go without maintenance before the clock starts ticking faster? About one year. After twelve months of neglect, every component ages faster. The compressor strains. The fan wobbles. The coils corrode. Consequences of Skipping HVAC Maintenance Skipping one year of maintenance might shave two or three years off your HVAC system lifespan. That means replacing your unit earlier than you planned. A
10 AC Maintenance Tips That Keep Your Unit Running Like New

You walk into your house on a hot summer day and wait for that blast of cold air. Nothing. Or worse, the air comes out weak and barely cool. Your energy bill keeps creeping up, and you’re not sure why. Here’s the thing about air conditioners. They don’t fail suddenly. They fail slowly, quietly, over months of neglect. A dirty filter here, a clogged drain there. By the time you notice, the damage is already done. This guide covers 10 AC maintenance tips that actually work. Simple things you can do yourself, plus a few that are worth calling a pro for. 10 AC Maintenance Tips That Keep Your Unit Running Like New Tip 1: Replace or Clean Air Filters Regularly This is the single most important thing you can do for your AC. A dirty filter restricts airflow, which makes your system work harder, run longer, and cool less. Over time, that extra strain wears out components and drives up your energy bill. Check your filter every month during the cooling season. If you have pets or run the system constantly, you’ll need to replace it more often. Disposable filters should be swapped out every 1 to 3 months. Washable filters need cleaning about every 30 days. Hold the filter up to a light. If you can’t see through it, it’s time for a new one. A clean filter is cheap insurance against bigger problems. DIY AC maintenance tips start right here. This is something every homeowner can do with zero tools and five minutes of time. Mark it on your calendar. Set a reminder. Your AC will thank you. Tip 2: Keep the Outdoor Unit Clean and Clear Walk outside and take a look at your condenser unit. The one with the fan inside a metal cabinet. If it’s buried in leaves, surrounded by overgrown bushes, or caked with dirt, your AC is working twice as hard as it needs to. The outdoor unit needs room to breathe. Keep at least two feet of clearance around all sides. Trim back any shrubs or plants that have gotten too close. Pull away leaves, grass clippings, and debris that collect near the base. A quick cleanup twice a year, once in spring before cooling season starts and once in fall after things wind down, makes a noticeable difference in performance. If the coil fins look dirty, you can gently spray them with a garden hose. Never use a pressure washer. The force will bend the delicate fins and do more harm than good. A light rinse from the inside out, with the power shut off first, knocks off the dust that builds up over winter. This is one of the easiest AC unit maintenance tips. No special tools, just a few minutes of your time a couple times a year. Tip 3: Clean the Coils Your AC has two sets of coils. The condenser coils outside release heat from your home. The evaporator coils inside absorb it. When either set gets dirty, heat transfer slows down, and your system has to run longer to hit the set temperature. The outdoor coils are easy enough to clean yourself. Shut off power to the unit. Remove the fan cage if you can access it safely. Gently spray the coils from the inside out with a garden hose. A soft brush can help loosen stubborn dirt. The indoor evaporator coils are harder to reach and usually best left to a professional during an annual tune-up. Clean coils can improve efficiency by as much as 30 percent. Tip 4: Clear the Condensate Drain Line As your AC runs, it pulls moisture out of the air. That water drains through a small pipe, usually PVC, near your indoor unit. Over time, algae and gunk can clog that line. When that happens, water backs up and can cause damp spots, mold, or even a shutdown if the safety switch trips. Find the drain line. Look for a small pipe with a cleanout cap near your furnace or air handler. Pour a cup of distilled white vinegar down it every few months. The vinegar kills algae before it can build up. If the line is already clogged, a wet/dry vacuum on the outdoor end of the pipe can pull the blockage loose. Tip 5: Inspect and Seal Ductwork Your ducts carry cooled air from your AC to every room. If they have leaks, that air escapes into your attic, crawlspace, or walls before it ever reaches you. That means your AC runs longer and your rooms never feel quite right. Look at any ductwork you can see in unfinished basements or attics. Feel along the seams for escaping air. Check for disconnected sections, holes, or crushed spots. Seal small gaps with UL-listed foil tape, not regular duct tape which dries out and fails. For larger gaps, mastic sealant works better. Sealing leaky ducts can cut energy loss by 20 percent or more. Maintenance on central air conditioner systems includes checking the ductwork that distributes the air. If you can’t access your ducts or find significant damage, a professional can perform a more thorough inspection. Tip 6: Check Your Thermostat Settings Your thermostat tells your AC when to run and when to stop. If it’s not reading temperature correctly, your system might be working overtime for no reason. Make sure the thermostat is level on the wall. A slight tilt can throw off the reading. If it’s battery powered, fresh batteries prevent unexpected shutdowns. Consider upgrading to a programmable or smart thermostat if you haven’t already. These models learn your schedule and adjust temperatures automatically, saving energy when you’re away and cooling back down before you get home. Tip 7: Listen for Unusual Noises and Watch for Common AC Problems Your AC shouldn’t make sounds that make you look up from what you’re doing. Grinding, squealing, banging, or hissing are all signs something’s wrong. Grinding often means a motor bearing is failing. Squealing could be a worn
3 Ways Short-Cycling is Killing Your AC Unit’s Motor Right Now
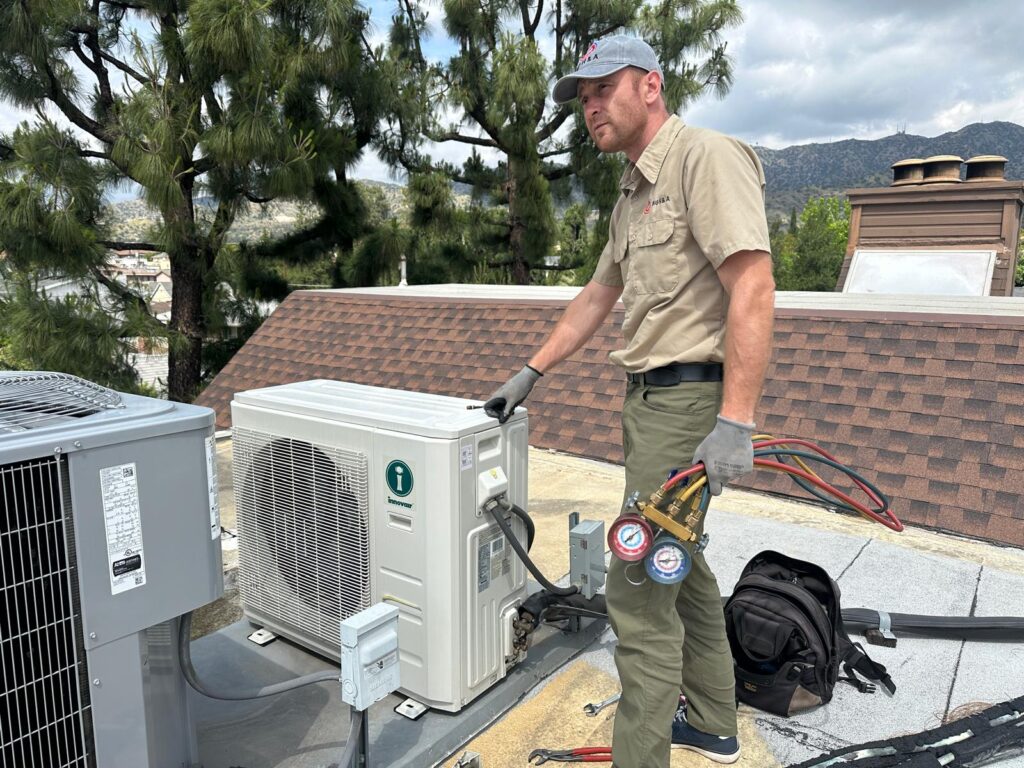
You are sitting on your couch, and you hear that “Click”. The AC kicks on, you feel a quick burst of cool air, and then, five minutes later, click, it shuts off. Two minutes after that, click, it starts again. This is not normal, and your air conditioner is not happy about it. Understanding what is AC short cycling and why does it happen is not complicated. Your system should run for about fifteen minutes at a time, take a break, then run again. When it starts stopping every few minutes, something is wrong. And every one of those short, choppy cycles is doing real damage to the most expensive part of your unit. This blog walks you through three ways short cycling quietly destroys your AC motor and compressor. Plus how to stop it before your next repair bill hits four figures. What Is AC Short Cycling and Why Does It Happen? Let us start with the basics. What is actually going on when your AC acts like a nervous teenager checking their phone? The Normal Cycle How long should AC cycle on and off? A healthy air conditioner short cycling? No. A healthy AC runs in predictable patterns. On a warm day, your system should kick on and run for about 15 to 20 minutes. Then it should stay off for 7 to 10 minutes and then it repeats. That is the rhythm your compressor was built to handle. The Short Cycle The AC unit cycling on and off every few minutes is not that rhythm. When your system runs for less than 10 minutes, sometimes as little as 2 or 3, then shuts off, then starts again almost immediately, you have an air conditioner cycling too fast. You will notice the signs. The compressor outside clicks on and off constantly. Your home never quite reaches the temperature you set. The air feels clammy because the system did not run long enough to pull out humidity. And your electric bill creeps up for no obvious reason. What Causes Short Cycling in an AC Unit? Several things can trigger this behavior. What causes an air conditioner to short cycle is not one thing. But the damage it causes is always the same. A brand new AC short cycling is especially frustrating. If your fresh installation cycles on and off every few minutes, the unit was likely sized wrong or installed improperly. Do not ignore it hoping it will fix itself. Now let us talk about what that damage actually looks like. Why Short Cycling Is a Silent Killer for Your AC Unit Now for the part that keeps HVAC technicians busy. Here is exactly how short cycling destroys your system from the inside out. 1. Excessive Heat Buildup in the Compressor Motor Every time your AC starts up, the compressor draws a massive surge of electricity. We are talking 5 to 8 times its normal running amperage. And that surge generates intense heat in the motor windings. Under normal operation, that heat has time to dissipate. The compressor runs for 15 to 20 minutes, then rests. But when short cycling ac compressor behavior kicks in, the motor starts and stops constantly. It never gets a real break and the heat builds up cycle after cycle. Can short cycling damage the AC compressor motor? Absolutely. Those motor windings have insulation that breaks down when overheated repeatedly. Once the insulation fails, the motor shorts out., the compressor is dead, and you are looking at a bill between $1,500 and $3,000. Think of it like driving your car with the engine overheating every day. You might make it to work. But you will not make it through the summer. 2. Loss of Lubrication and Mechanical Wear The compressor relies on refrigerant to carry oil through its internal parts. That oil lubricates the pistons, cylinders, and bearings. During a normal cycle, the compressor runs long enough to circulate that oil properly. When compressor short cycling happens, the compressor shuts off before the oil has fully circulated. Parts run dry, metal grinds on metal. friction increases, and at last, wear accelerates. But why would an AC unit short cycle into an early grave? This is a big reason. The mechanical damage is not something you can see until it is too late. One day the compressor just stops working. By then, the internal damage has been building for months. And in case you are wondering “Is short cycling bad for air conditioner lifespan?”, yes. A compressor that should last 12 to 15 years can fail in 3 to 5 years under constant short cycling. That is a massive loss of value from a problem that started small. 3. Electrical Component Fatigue The compressor does not work alone. It needs a capacitor to start and run, it needs a contactor to switch the high voltage on and off, and it needs a control board to manage the sequence. Every time your AC short cycles, these electrical components get hammered. The capacitor weakens with each startup surge. Instead of lasting 5 to 7 years, it fails in 2 or 3. On top of that, the contactor suffers from constant switching. The contacts pit and burn, leading to erratic operation or complete failure. So stop AC short cycling before these components fail, or you will be replacing them repeatedly. Each repair costs $150 to $400. Add them up over a few years, and you could have paid for a new system. How to Fix AC Compressor Short Cycling? If your AC unit is kicking on and off repeatedly, don’t panic. Short cycling is a common issue, and in many cases, you can fix it with a few simple steps. Here’s how to get your system back on track: 1. Replace Air Filters Regularly A clogged air filter is one of the most common reasons for compressor short cycling. When airflow is restricted, your system struggles to function properly, leading to frequent starts and stops. Check your
Fast and Reliable Cooktop and Stove Repair Tips

Your cooktop or stove is the heart of your kitchen, helping you cook meals for family, friends, and yourself every day. But what happens when burners stop heating, ignitions fail, or your induction cooktop refuses to recognize your cookware? That’s where fast, reliable cooktop repair services come in. In this guide, we’ll cover the most common cooktop problems, brand-specific repair tips, and expert maintenance advice to keep your stove running smoothly. Common Issues with Different Types of Cooktops Even the most reliable cooktops and stoves can develop quirks over time. Knowing what to look for can save you time, prevent bigger issues, and keep your kitchen running smoothly. Here are the most common problems by cooktop type and what they usually mean: Brand-Specific Cooktop Issues: Tips for Thermador, GE & Wolf Owners Not all cooktops are created equal. Different brands have unique features and possible quirks that can affect performance and repairs. Being aware of these can help you troubleshoot minor issues or know when it’s time to call a professional. Engaging technicians familiar with specific brand nuances ensures quality repairs and extends appliance lifespan. Benefits of Professional Cooktop and Stove Repair Services While it might be tempting to try DIY fixes, some cooktop problems are best handled by professionals. Here’s what entrusting repairs to qualified professionals offers: Essential Cooktop Cleaning and Maintenance Tips for Every Surface Keeping your cooktop in top shape not only looks great but also extends its lifespan. Different surfaces require different care, so here’s what you need to know: Following these tips helps your cooktop perform better and look its best. Even with proper care, some issues may still require professional attention, but knowing how to maintain your appliance can minimize problems and keep your kitchen running smoothly. Conclusion Timely detection and resolution of cooktop and stove issues are vital for kitchen safety and efficiency. Trusting professionals with repairs and maintenance ensures your appliances operate reliably over the long term. At Big H & A, we specialize in the repair and installation of household appliances and HVAC systems. With over a decade of experience and a stellar reputation, we provide prompt and high-quality service. Our technicians are EPA and BHGS certified, fully insured, and committed to customer satisfaction, often completing repairs the same day at affordable rates. Don’t delay addressing appliance issues. Entrust your appliances to experts and enjoy uninterrupted kitchen functionality. Frequently Asked Questions 1. How do I know if my cooktop needs professional repair? If burners aren’t heating, touch controls fail, or you smell gas, it’s time to call a certified technician. 2. Can I fix gas cooktop ignition problems myself? Minor clogs can be cleaned, but persistent ignition or gas issues should be handled by a professional for safety. 3. How do I maintain a glass-ceramic cooktop? Use gentle cleaners and a designated scraper for burnt residue; avoid metal scouring pads and harsh powders. 4. Are certain cooktop brands harder to repair than others? High-end brands like Thermador and Wolf have specialized features that often require certified technicians, while GE parts are generally easier to source. 5. How often should I have my cooktop professionally checked? An annual inspection or whenever you notice unusual performance can prevent bigger problems and extend appliance lifespan.
What Happens When HVAC Load Calculation Is Done Incorrectly

You finally upgrade your HVAC system, hoping for perfect comfort, but the air still doesn’t feel right. Ever wondered what happens when HVAC load calculation is wrong or why a brand-new system doesn’t deliver as promised? The answer usually comes down to issues with the math because it is either an incorrect HVAC load calculation or a forgotten detail about your home’s actual needs. It’s not just about picking the latest model or the biggest unit. Comfort problems, surprise energy bills, and even early equipment failure can all stem from skipping proper calculations when sizing your system. Too big? Too small? Both can create messier headaches than you’d expect. In this guide, we’ll go behind the scenes to show you how getting that load calculation for HVAC system right can save money, keep your living space steady, and protect your investment for years to come. What Is an HVAC Load Calculation and Why Does It Matter? Imagine going to a shoe store and buying a pair of sneakers based entirely on how tall you are. Sounds a bit ridiculous, right? Your feet have their own unique width, arch, and length. Well, your house works the exact same way. An HVAC load calculation is the mathematical formula used to figure out exactly how much heating and cooling your home actually needs. It doesn’t just look at the square footage. Instead, it measures everything from your ceiling height and wall insulation to the direction your windows face, your local climate, and even how well your doors seal. To accurately calculate HVAC load, professionals look at how much heat your house naturally receives during a scorching summer day and how much it loses on a freezing winter night. It is a precise process, not a guessing game. But, why does this matter to you and your wallet? Because precision equals comfort. When your equipment is perfectly matched to your home’s unique thermal blueprint, it runs in steady, efficient cycles. That means it successfully pulls the sticky humidity out of the air, keeps your energy bills predictable, and prevents premature wear and tear on the machinery. On the flip side, when installers skip this part, you run into massive HVAC sizing problems. What Are Common Mistakes in Load Calculations? When it comes to getting the right system for your home, precision matters more than you might think. Many HVAC contractors cut corners or rush through measurements, leading to issues down the line. Here are the most common mistakes in HVAC load calculations: What Percentage of HVAC Installations Are Done Incorrectly? When you hire professionals, you expect the math to be perfect. Yet, industry research reveals that nearly 90% of HVAC systems are installed incorrectly. The main reason behind this failure rate is improper equipment sizing. Installers often skip precise measurements in favor of quick guesswork, leaving you with a unit that simply doesn’t fit your home. This lack of detail creates immediate problems. If a crew guesses too high, you end up with an oversized HVAC system that blasts air and shuts off before removing sticky indoor humidity. If they guess too low, you get an undersized HVAC system that runs non-stop, desperately trying to cool a space it cannot handle. These sizing errors go far beyond minor annoyances. They directly cause spiked energy bills, uneven room temperatures, and early equipment breakdowns. So if you want to protect your investment and ensure true comfort, you must hire a professional HVAC company that prioritizes accurate measurements from the very beginning. What Happens When HVAC Load Calculation Is Done Incorrectly? When contractors skip accurate HVAC load calculations, your home’s comfort takes a massive hit. You end up with equipment that simply does not fit your space. Whether the unit is too large or too small, skipping the math always leads to expensive consequences. Let’s look at the two main ways this goes wrong. Problems Caused by Oversized HVAC System Homeowners often think bigger is better, but what happens if the HVAC system is too big for a house? You are looking at serious trouble, including: Problems Caused by Undersized HVAC System You now know that an oversized HVAC system invites nothing but trouble. But what about the ones that are undersized? Buying equipment with too little power causes its own headaches: How Do I Know If My HVAC System Is Wrongly Sized? If your home never quite feels comfortable, you might be asking yourself, “How do I know if my HVAC system is wrongly sized?” It is a good question. Even if you recently hired professional HVAC services to install a brand-new unit, incorrect equipment sizing can ruin its performance from day one. Fortunately, you do not need to be an HVAC expert to spot the warning signs. Your house will give you a few obvious clues if the equipment is too big or too small for your actual square footage: Uneven Temperatures Across Rooms If your living room feels like a freezer but your upstairs bedroom feels like an oven, your system is struggling to push air evenly through your ductwork. High Energy Bills Despite a New System A modern, high-efficiency HVAC unit should actually lower your monthly costs. If your power bill stays high or suddenly spikes, your equipment is likely wasting energy because it does not match your home’s layout. Frequent Cycling or Constant Running Listen to how often your unit turns on. Does it blast air for five minutes and shut right back off? Or maybe it runs all day without ever taking a break? Both of these extreme behaviors point straight to a sizing issue. Poor Humidity Control Your air conditioner does more than just cool the air; it also pulls moisture out of your house. If your indoor air constantly feels thick, sticky, and clammy during the summer months, the unit is failing to properly dehumidify your living space. How Professionals Calculate HVAC Load Accurately If you want your home to be perfectly comfortable, guessing simply will not work.
Expert Appliance Service for Top Brands
Household appliances are designed to make life easier, but even reliable brands like Bosch, Whirlpool, and LG can develop issues over time. Whether it’s a fridge that won’t stay cold, a dishwasher that leaves dishes dirty, or a washer that leaks water, these problems can disrupt your daily routine in Woodland Hills. Understanding the unique features and potential challenges of different appliance brands can help you make smarter choices when it comes to service and maintenance. In this guide, we’ll cover the most common appliance problems, brand-specific service insights, the benefits of expert repairs, and practical tips to keep your home appliances running smoothly year-round. Common Appliance Problems for Bosch, LG, Whirlpool, and High-End Brands Every appliance brand comes with its own design features—and its own set of potential issues. Knowing these can help you spot problems early and get the right service for your Woodland Hills home. Recognizing these brand-specific challenges helps you anticipate maintenance needs and choose the right expert service before small issues turn into costly repairs. The Benefits of Expert Appliance Service Choosing expert appliance service is one of the best ways to keep your home appliances reliable for years. While a DIY fix might seem quick and convenient, it can sometimes make the problem worse and more expensive to repair later. Here’s why professional service makes a difference: Investing in expert service not only extends the life of your appliances but also saves you time, money, and the stress of unexpected breakdowns. Essential Appliance Maintenance Tips Regular maintenance is the key to keeping your home appliances running efficiently and avoiding costly breakdowns. Follow these practical tips to extend the life of your Bosch, LG, Whirlpool, and other appliances: Taking these steps not only keeps your appliances performing efficiently but also helps reduce energy bills and avoid unexpected downtime. Brand-Specific Appliance Repair Tips Different appliance brands have unique features and unique repair needs. Understanding these traits helps you anticipate potential problems and choose the right appliance repair service in Woodland Hills. Bosch Known for quiet, precise performance. Common issues include dishwasher water drainage problems and heating system malfunctions. Whirlpool Durable and long-lasting, but wear-related problems such as door seal deterioration or unbalanced drums can occur in washers and dryers. LG Packed with smart technology, LG appliances can experience sensor errors, digital malfunctions, or ice maker and cooling problems in refrigerators. High-End Brands (Miele, Thermador) These premium appliances deliver exceptional performance but require specialized care. Issues like inconsistent oven temperatures or ventilation challenges often need professional attention. By knowing each brand’s tendencies, you can stay ahead of potential problems, prevent costly repairs, and ensure your appliances continue to run efficiently. When to Call for Professional Appliance Repair Service Not every appliance hiccup can be solved with a quick DIY fix. Certain problems require professional attention to avoid bigger issues and costly repairs. You should consider calling an expert appliance repair service in Woodland Hills if you notice: Addressing problems early not only prevents minor issues from becoming major repairs but also keeps your appliances running safely and efficiently. For fast, reliable service, reach out to our Woodland Hills team to schedule an expert visit today. Conclusion Your home appliances are essential for convenience, efficiency, and peace of mind in your Woodland Hills home. Keeping them in top condition takes a combination of regular care, awareness of brand-specific challenges, and professional appliance service when needed. By understanding common issues with Bosch, Whirlpool, LG, and high-end brands, you can spot potential problems early and prevent costly repairs. From cleaning filters and checking seals to scheduling expert repairs, the right approach keeps your appliances running smoothly for years to come. When problems arise that require professional attention, trust our appliance repair company. At Big H & A, we specialize in the repair and installation of household appliances and HVAC systems. With over a decade of experience and a stellar reputation, we provide prompt and high-quality service. Our technicians are EPA and BHGS certified, fully insured, and committed to customer satisfaction, often completing repairs the same day at affordable rates.
Everything You Need to Know About Appliance Repair

Household appliances are an essential part of modern life. From the refrigerator that keeps your food fresh to the washing machine that saves you hours of labor, these devices simplify our daily routines. But like any other machinery, they can break down over time or start working inefficiently. While some might attempt a DIY fix, it often leads to more damage and costly repairs. Professional appliance repair is the safest, fastest, and most effective solution to restore your appliances. In this article, we’ll cover the types of appliances we service, common issues, and why choosing professional repair is your best option. Household Appliances We Repair We repair a wide range of household appliances, each with its own unique components and repair needs. Our experienced technicians have the skills and tools to handle everything from small malfunctions to major breakdowns. Below are the main categories of appliances we service to keep your home running smoothly: Common Appliance Problems & How We Repair Them Recognizing the signs of appliance problems early can save you time, money, and frustration. Here are some of the most common issues we encounter and how our experts fix them: Why Choose Our Appliance Repair Company? Choosing the right team for appliance repair is essential to save time, avoid stress, and ensure your appliances are fixed correctly the first time. Here’s why we’re the top choice for your needs: Conclusion Appliances play an important role in keeping your home running smoothly, and even a small problem can cause big disruptions. Timely repairs not only extend the life of your appliances but also prevent costly issues from developing. By relying on professional appliance repair, you make sure your devices are fixed quickly, safely, and effectively, saving you time, stress, and money. Don’t wait for a small issue to become a major problem. Schedule your appliance repair services with Big H & A Service today or request a consultation with our expert team. Don’t forget to check out our special first-time customer discounts and ongoing promotions! Frequently Asked Questions Q1: What appliance repair services do you offer? We repair refrigerators, dishwashers, ovens, stovetops, washing machines, dryers, and HVAC systems. Q2: What are the key factors to consider when choosing an appliance repair technician? Look for experience, certifications, fast service, transparent pricing, and reliable warranties. Q3: What is the most common appliance repair? Refrigerator and washing machine repairs are the most frequently requested services. Q4: Which appliance breaks down the most? Washing machines and dryers often experience the most issues due to frequent daily use. Q5: How much is an appliance repair service call? Costs vary by appliance and issue, but we provide upfront pricing wit
Expert Washing Machine Repair: Troubleshooting & Solutions for Top Brands
Washing machines are our hardworking home helpers, keeping laundry fresh and tidy day after day. Even the most reliable models, however, can run into problems over time. Knowing the common issues and how to handle them not only keeps your washer running smoothly but also extends its lifespan. Whether you own an LG, GE, Electrolux, Maytag, or Haier machine, these tips can help you prevent small glitches from turning into costly repairs. Common Washing Machine Problems and How to Fix Them Even the most reliable washing machines can run into issues that disrupt your laundry routine. Here are the most common problems and simple ways to fix them: Popular Washing Machine Brands and Their Common Issues Each washing machine brand brings its own strengths and occasional weaknesses. Here’s a quick guide to common issues by brand and how to handle them: Easy DIY Tips to Extend Your Washing Machine’s Life Proactive care can prevent many issues and keep your washing machine in peak condition. Try these steps: Why Professional Washing Machine Repairs Are Worth It Some washing machine issues are easy to handle at home, but others require a professional touch. Expert technicians have the training, tools, and experience to tackle complex problems, like motor repairs, electronic panel troubleshooting, or sensor malfunctions, safely and efficiently. Using genuine replacement parts not only restores your washer’s performance but also protects your warranty and prevents recurring problems. Calling a professional early can save time, stress, and costly washing machine repairs, ensuring it keeps running smoothly for years to come. When to Call a Professional for Washing Machine Repairs Not all fixes are suitable for home handling. Contact a professional if you encounter: The Advantage of Brand-Specific Knowledge in Washing Machine Repairs Every washing machine brand has its own design quirks and common issues. Whether it’s an LG with a touchpad error, a GE with suspension problems, or a Haier with sensor glitches, having a technician familiar with your specific brand makes a big difference. Brand-specific expertise allows professionals to diagnose issues quickly and accurately, ensuring your washer is repaired correctly the first time. This tailored approach not only saves time but also keeps your machine performing like new, so you can get back to hassle-free laundry days sooner. Closing Thoughts A washing machine is a vital part of your daily routine, deserving care to maintain its efficiency. By recognizing common pitfalls, applying regular upkeep, and turning to professionals when needed, you can ensure your LG, GE, Electrolux, Maytag, or Haier unit remains a dependable household asset. With the right attention, your appliance will continue to tackle laundry loads effortlessly for years ahead. At Big H & A Service, we specialize in Appliance Repair Services, handling everyday home appliances with unmatched expertise and experience, so you never have to bounce between multiple contractors for washing machine repairs again. FAQs 1. What is the most expensive part to replace on a washing machine? The motor or electronic control board is usually the costliest part to replace, often requiring professional repair. 2. What is the most reliable brand of washing machine? Brands like LG, Maytag, and Electrolux are known for durability and consistent performance over time. 3. What is the average lifespan of a washer? Most washing machines last between 10–15 years with proper maintenance and regular care. 4. What is the most common fault on a washing machine? Drainage issues, unbalanced drums, and failure to spin are the most frequent problems. 5. What are the signs of a dying washing machine? Persistent leaks, loud unusual noises, repeated error codes, or failure to spin or drain indicate serious wear or impending failure.