
Ductless Mini-Split Installation in Burbank: Why It’s the Best Fit for Local Homes

Summer in Burbank can get brutally hot, and a cooling system that works without stopping isn’t just a luxury, it’s essential for comfort and peace of mind. But not every home here is built for traditional central air conditioning systems. And that’s exactly where ductless mini-splits come in. These high-efficiency, flexible systems let you control the temperature in each room without tearing out walls or installing bulky ductwork, which makes them the perfect solution for Burbank homes of all shapes and sizes. What Exactly Is a Ductless Mini-Split System? Think of a ductless mini-split system as giving every room in your home its own thermostat. Instead of trying to cool or heat your entire house with one central unit, a mini-split lets you target only the spaces you’re using—perfect for bedrooms, home offices, or converted garages. A typical system has an outdoor compressor and one or more indoor air handlers, all connected through a small, concealed line that fits through a tiny wall opening. That means no messy ductwork, no dusty vents, and no major renovations. Just efficient, targeted comfort where you need it most. Every indoor unit comes with its own remote or smart control, so you can easily set different temperatures for each zone. Want your bedroom cool at night but the living room warm in the morning? Easy. Why Burbank Homes Are Perfect for Mini-Splits Burbank homes are unique, with historic bungalows in Magnolia Park, modern ADUs tucked behind main houses, and garages converted into home offices. While full of charm, many of these properties were not built for traditional HVAC systems. That’s where ductless mini-split ACs shine, delivering comfort to spaces that ductwork can’t reach. Here’s why homeowners love them: Whether you’re cooling one room or multiple spaces, mini-splits offer unmatched flexibility and efficiency for every type of home. How Does Installation Actually Work? Installing a ductless mini-split system is quick, clean, and minimally disruptive, but it’s not a DIY job and best left to a licensed HVAC professional. Here’s what the process typically looks like: Depending on the number of indoor units, most installs wrap up in one day. And yes, if you’re in Burbank, the contractor will also pull permits and ensure code compliance, so you don’t have to worry about a thing. Ductless Mini-Split Installation Costs in Burbank The cost of installing a ductless mini-split system in Burbank depends on the number of indoor units, the system brand, and the complexity of the installation. Here’s a typical range for local homes: Rebates & Incentives: California often offers energy-efficiency rebates through programs like TECH Clean California. You might qualify for hundreds of dollars in rebates for installing high-SEER systems. Your contractor should help you apply so you don’t miss out on these savings. Key Factors to Consider Before Installing a Mini-Split Why Burbank Homeowners Trust Big H & A Solutions At Big H & A Solutions, we’ve helped hundreds of homeowners enjoy reliable, energy-efficient comfort with expertly installed ductless mini-splits. Here’s why our clients keep coming back: Ready to upgrade your home comfort? Explore our AC tune-up services or see how we AC repairs. For a free consultation on ductless mini-split installation in Burbank, Contact us for a free consultation today and take the first step toward a cooler, more comfortable home. Final Thoughts For Burbank homeowners, ductless mini-split air conditioners offer a modern, energy-efficient solution to keep every room in your home comfortable year-round. Whether you’re retrofitting a charming older bungalow, adding a backyard office, or simply upgrading your living spaces, these systems provide customized zoning, lower energy bills, and a quick, clean installation. At Big H & A Solutions, we’re dedicated to helping you get it right the first time. Our expert team handles everything from system selection to permits, installation, and rebates so you can relax and enjoy the perfect indoor climate. Don’t wait for the next heatwave. Contact us today for a free consultation and see how a ductless mini-split works for you. FAQs 1. How much does it cost to install a ductless mini-split? Installation costs in Burbank typically range from $2,800 for a single-zone system to $9,000+ for multi-zone setups, depending on units, brand, and labor. 2. Can I install a mini-split system myself? Mini-splits should be installed by a licensed HVAC professional. DIY installation risks poor performance, leaks, and code violations. 3. Where should you not install a mini-split? Avoid placing units behind furniture, in direct sunlight, or where airflow is blocked, as this reduces efficiency and comfort. 4. What are the benefits of installing a ductless mini-split? They offer room-by-room temperature control, energy efficiency, quiet operation, and fast, minimally invasive installation. 5. How long does a ductless mini-split installation take? Most Burbank installations are completed in one day, including setup, mounting, testing, and permit handling.
A Homeowners Guide For Heat Pump Installation in Santa Monica

Thinking about improving indoor climate control in your Santa Monica home? You are at the right place at the right time! A high-efficiency heat pump is a smart choice for maintaining cozy warmth during colder months and refreshing coolness when it’s hot outside. This guide covers everything you may be thinking of, from selecting the right configuration to how the setup process works, including a link to schedule service with licensed local specialists. Why Is a Heat Pump Ideal for Homes in Santa Monica? Living in Santa Monica means enjoying mild, ocean-moderated weather, but even here, having reliable year-round comfort matters. A high-efficiency heat pump gives you exactly that: warm, cozy indoor spaces during the cooler months and refreshingly cool air when summer hits. Unlike traditional heaters or air conditioners that generate warmth or cold, a heat pump moves thermal energy from one place to another. In winter, it draws heat from the outside air and brings it indoors. In summer, it works in reverse, taking indoor heat and releasing it outside. And because the local weather conditions here are rarely extreme, these systems run efficiently with minimal strain. This means fewer breakdowns for you and better performance than older HVAC systems. Top reasons Santa Monica homeowners choose heat pumps: Explore Heat Pump Models Before Installation If you’re getting ready to install a heat pump in Santa Monica, here’s what to know about the available configurations: Air-Source Models These units pull warmth from the outside air and are perfect for Santa Monica’s mild winters. They provide consistent heating in winter and cooling in summer without breaking your bank. Ductless Mini-Splits No ducts? No problem. Ductless mini-splits let you control the temperature of individual rooms, making them perfect for retrofitted homes, apartments, or spaces without existing ductwork. Dual-Fuel (Hybrid) Systems These combine electric heat pump efficiency with a backup gas furnace. While not usually necessary in Santa Monica, they can offer extra flexibility for homes that need extra heating during occasional cold spells. What makes heat pumps stand out: Things to keep in mind: What to Check Before Heat Pump Installation Before you schedule your heat pump installation, it’s important to make sure your home is ready. A few key checks now can save time, money, and frustration later. What to Expect During Heat Pump Installation Getting a heat pump installed? Here’s a step-by-step look at what happens when homeowners upgrade their system: Most installations take 1–3 days, depending on the complexity of the system and your home’s setup. Common Heat Pump Installation Problems in Santa Monica Even in a favorable region like Santa Monica, a few challenges might come up during heat pump installation. Knowing what to watch for can save you time, money, and frustration. Hiring local HVAC experts familiar with Santa Monica homes can help you avoid these common issues, ensuring a smooth installation and long-lasting performance. Heat Pump Maintenance Schedule A heat pump is an investment in comfort and energy savings, and regular maintenance helps it last longer while running efficiently. Here’s a simple guide to keeping your system in top shape: If you notice unusual noises, uneven heating or cooling, or a spike in energy bills, it’s time for a professional check. Conclusion: Should You Invest in a Heat Pump Installation? Absolutely. With Santa Monica’s stable climate and increasing energy costs, switching to a heat pump is both cost-effective and future-proof. You’ll enjoy all-season comfort, fewer maintenance issues, and lower bills — all from one eco-friendly system. Ready to upgrade your comfort? Book your heat pump installation today and trust our licensed & certified technicians to handle every detail with care, precision, and attention to detail. FAQs 1. How much does it cost to install a heat pump in Santa Monica? Installation costs vary depending on system type and home size, but most homeowners can expect to pay between $4,000 and $8,000 for a full setup, including labor and equipment. 2. What are the benefits of installing a heat pump? Heat pumps provide year-round comfort, lower energy bills, and eco-friendly heating and cooling, all in a single, compact system. 3. Is it worth getting a heat pump installed? Yes. For Santa Monica homes, heat pumps offer efficient, reliable climate control, reduced maintenance, and long-term energy savings. 4. How long does a heat pump last? With proper maintenance, a high-efficiency heat pump can last 15–20 years while maintaining optimal performance. 5. Do I need ducts for a heat pump? Not always. Ductless mini-splits allow for zoned temperature control in homes without existing ducts, while traditional split-systems use existing ductwork.
Heat Pump Not Cooling? Fast & Certified Heat Pump Repair in Canoga Park
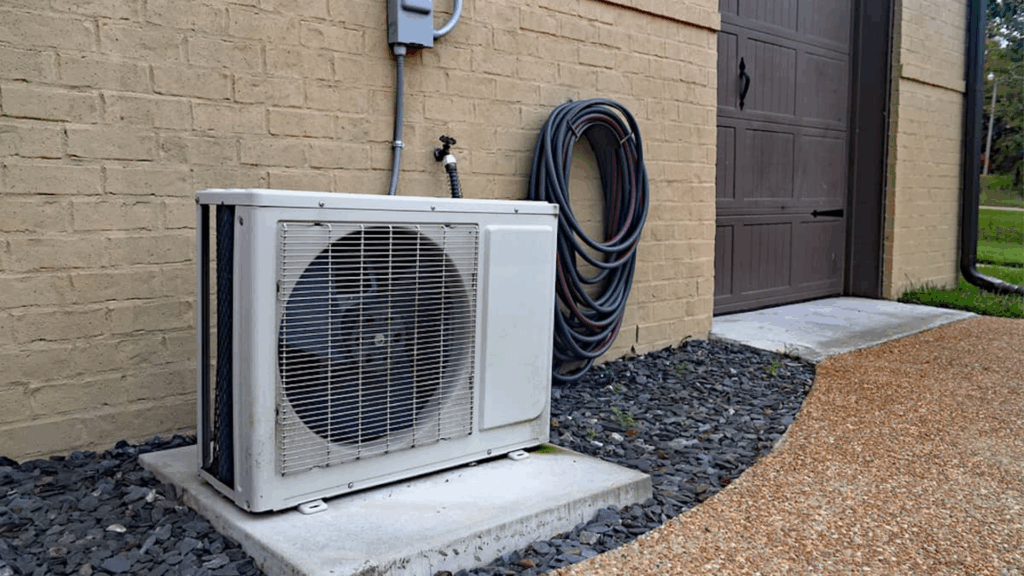
Is your heat pump blowing air that’s too warm in summer or too cool in winter? Ignoring the warning signs is a common mistake that most homeowners make, which not only is a comfort issue but can also lead to costly breakdowns. And this is precisely why we offer same-day heat pump repair in Canoga Park, backed by CA C-20 Licensed heat pump technicians that handle everything from minor refrigerant leaks (R32, R454B, R410A, R407C, R22) to major compressor or control board issues, making sure your home stays comfortable, no matter the season. We service homes, apartments, and commercial buildings across Canoga Park, Woodland Hills, Reseda, and the greater San Fernando Valley. With fully stocked service trucks, we can often complete repairs the same day. Don’t wait for a complete system failure. Schedule a heat pump repair visit today to avoid unnecessary replacement costs and enjoy uninterrupted comfort all year long. 7 Signs Your Heat Pump Needs Immediate Repair Most homeowners in Canoga Park call us only after their system stops working. The smart approach? Catch problems early. Watch out for these warning signs: Any of these signs may point to refrigerant leaks, fan failure, control board malfunction, or a worn-out compressor. If you notice even one of them, don’t delay — you can schedule a heat pump repair visit right now via the request form. Common Heat Pump Problems We Fix Heat pumps can fail for many reasons, and accurate diagnostics are important if you want to avoid sudden heat pump breakdowns. We fix all major issues throughout Canoga Park and the greater Los Angeles area, with our team servicing all major brands, including Carrier, Payne, Lennox, Trane, Goodman, Daikin, and more. Common heat pump repairs we handle: We always provide a clear written estimate before any work begins. Most repairs are completed on the first visit thanks to our fully equipped trucks. All services are performed safely and efficiently by our locally trusted CA C-20 Licensed technicians, with 1-year labor warranty and 10-year parts warranty. Why Homeowners in Canoga Park Choose Us We’re a trusted name in Canoga Park and neighboring communities because we deliver consistent results, on time, with full transparency. Our HVAC services meet all California standards for residential and commercial properties, making us the top choice for heat pump repairs in the town. Here’s what sets us apart: Whether you’re managing a single-family home or a high-traffic commercial facility, our team performs every job according to safety and energy-efficiency standards. We don’t just fix equipment, we back our heat pump repair solutions with written guarantees and long-term reliability, so you can have peace of mind knowing your system is in expert hands. You’ll also find our full list of 100 reasons to choose us on the website — and not a single reason not to. We believe in earning your trust through results. When Repair Isn’t Worth It: Time to Consider Heat Pump Replacement Repairing your heat pump isn’t always the smartest decision. Heat pumps generally have a lifespan of 10 to 16 years, with many lasting up to 15 years with proper maintenance. So if repairs aren’t doing the job now, replacing the system brings greater efficiency, fewer service calls, and long-term savings. We recommend considering a replacement if: In these situations, we help you choose an energy-efficient system that complies with Title 24 and comes with proper permitting and documentation. Explore your upgrade options on the heat pump installation page. We’ll handle the entire installation, from equipment selection to final inspection, all with warranty coverage included. How to Book a Heat Pump Repair With Us Booking heat pump repair in Canoga Park takes just a few minutes. For your convenience, we’ve streamlined the process so you can get help without hassle. All work is performed under CA C-20 License #1137826. We confirm pricing upfront, never upsell unnecessary services, and provide clear documentation with 1 year warranty on labor and 10 years on all replacement parts. No hidden fees. Just quality work delivered on time, every time. FAQs 1. What is the most common problem with heat pumps? The most common issues are refrigerant leaks, frozen outdoor units, and faulty thermostats. Early detection prevents major breakdowns. 2. What is the average lifespan of a heat pump? Heat pumps typically last 10–16 years, depending on maintenance and usage. Proper care can extend their life up to 15 years. 3. What are the signs of a failing heat pump? Watch for inconsistent temperatures, unusual noises, ice buildup, unresponsive thermostats, or rising electricity bills. 4. How expensive is it to fix a heat pump? Repair costs vary, but minor fixes like refrigerant recharge are affordable, while major repairs or repeated breakdowns may need replacement. 5. Can I repair my heat pump myself? DIY heat pump repair is not recommended. Heat pumps involve high-voltage electricity, refrigerants, and complex components, so only certified technicians should handle all repairs.
3 Situations Where Duct Replacement Makes More Sense Than Repair

You notice your energy bills creeping up. Some rooms feel stuffy while others are perfectly comfortable. Or perhaps you’ve spotted dust settling on furniture just hours after cleaning. The HVAC system keeps running, but something feels off. If you’ve been wondering why you would need to replace ductwork, you’re not alone. Most homeowners don’t think about their ducts until something goes wrong. And when it does, the question becomes whether to patch things up or start fresh. But how do you know if duct work needs to be replaced? That is precisely what this blog is all about. This guide covers three situations where replacement beats repair every time, because knowing when it is time for a replacement saves you from wasting money on fixes that don’t last. Understanding Ductwork Lifespan and Common Issues Before we get into the three situations where replacement makes sense, it helps to understand how ducts age and what goes wrong with them over time. What is the lifespan of HVAC ductwork? Most duct systems last between 10 and 15 years, though some can make it to 20 with proper maintenance. After that, the materials start breaking down, seals loosen, insulation degrades, and connections that once held tight begin to leak. So in case, your system is pushing two decades, the question “should ductwork be replaced after 20 years?” becomes worth asking seriously. The problems usually start small. A little less airflow here, a bit more dust there. But they add up. Leaks let conditioned air escape into spaces you’re not trying to heat or cool. Your HVAC works harder, your bills go up, and your comfort goes down. Other issues creep in too. Rodents or pests sometimes find their way into ducts, leaving behind debris and contamination. Moisture can lead to mold growth, especially in humid climates or where ducts run through crawl spaces. And in older homes, the ductwork might have been poorly designed or installed in the first place. When you start noticing these problems, you’re faced with a choice. Do you repair ductwork and hope it holds, or do you go for something more permanent? That depends on what’s wrong and how far gone your system really is. When Repair Makes Sense vs. When Replacement Is Better Not every duct problem requires tearing everything out and starting over. Sometimes a simple fix does the job. The trick is knowing which situations call for which approach. When repair makes sense: In these cases, repair ductwork leaks with mastic sealant or metal tape can restore proper function without the expense of full replacement. It’s a quick fix that buys you more years of service. When replacement is better: But there comes a point where patching things up stops making sense. If you’re constantly calling for repairs, if the problems keep coming back, or if your system is old enough that everything seems to be failing at once, replacement becomes the smarter move. The table below breaks down the differences: Factor Repair Replacement Cost upfront Lower Higher Long-term value Limited Significant Air quality impact Minimal Major improvement Efficiency boost Slight Substantial When to choose Minor, isolated issues Widespread damage, age, recurring problems Knowing the difference between ductwork repair and replacement comes down to looking at the big picture. A one-time fix for a single problem? That’s repair. A system that’s failing in multiple ways and costing you money month after month? That’s when replacement wins. 3 Situations Where Duct Replacement Makes More Sense Situation 1: Old or Severely Damaged Ductwork Age catches up with everything in your home, and your ductwork is no exception. If your system has been moving air for 15 or 20 years, it’s probably showing signs of wear. When to replace ductwork often comes down to how much life is left in the system. Old ducts develop cracks at the joints. The insulation wrapped around them gets thin or falls off entirely. Sections may have pulled apart from settling or poor installation. And in some cases, you might even see visible rust on metal ducts or crumbling on flex duct materials. Replacing ductwork in this situation isn’t just about fixing leaks. It’s about starting over with materials that actually work. New ducts are better insulated, better sealed, and designed to move air more efficiently than anything from 20 years ago. Signs you need new ducts include: If your system fits this description, replacing HVAC ductwork gives you a clean slate. No more patching, no more wondering what’s going to fail next. Just fresh, properly installed ducts that actually do their job. Situation 2: Persistent Air Quality or Mold Issues You clean your house regularly, but the dust keeps coming back. Family members sneeze more than usual or complain about stuffy air. Maybe you’ve noticed a musty smell that won’t go away no matter what you try. When air quality problems persist despite your best efforts, your ductwork might be the reason. Mold, mildew, dust, and even pest debris can accumulate inside ducts over time, and once these contaminants take hold, getting rid of them completely is nearly impossible. How do I know if my ducts are beyond repair? If you’re dealing with widespread mold growth or contamination that has soaked into duct materials, cleaning often isn’t enough. Mold spores embed themselves in porous surfaces, bacteria linger in places you can’t reach, and pest droppings leave behind allergens that no amount of vacuuming can fully remove. Full ductwork replacement becomes the only real solution in these cases. You’re not just replacing old ducts, you’re removing the source of the problem entirely. New ducts mean clean, fresh pathways for your air, free from years of accumulated contaminants. Consider replacement if: Ductwork replacement in this situation isn’t just about efficiency. It’s about health. Becasue clean air matters, and sometimes the only way to get it is to start over. Situation 3: Poor HVAC Efficiency Leading to High Energy Bills You’ve watched your energy bills climb higher every year. You’ve tried adjusting the
7 Common Mini-Split Problems After Installation and How to Fix Them

You finally had that mini-split installed. The one you’ve been reading about, the one that promised efficient heating and cooling without the trouble of ductwork. For a few months, it was perfect. Then one day, you notice your mini split not blowing air like it used to. Or worse, it’s not turning on at all. Here’s the thing about mini-splits. They’re reliable, but they’re not invincible. Even brand new systems can develop issues, especially if something went sideways during installation. The good news is that many of these problems are fixable once you know what to look for. This guide covers the seven most common mini split problems after installation and walks you through practical solutions. Because knowing what’s wrong is the first step to getting your comfort back. Why Mini-Splits Can Experience Problems After Installation Before we dive into specific issues, it helps to understand why a brand new mini-split might act up in the first place. Because sometimes the problem isn’t the unit itself. It’s how it got put in. Take for example, what is a common cause of mini-split heat pump failure related to installation? More often than not, it comes down to a few key mistakes during setup. Installation Issue What Goes Wrong Poor positioning Unit placed where airflow is blocked or restricted Incorrect sizing System too big or too small for the space Improper refrigerant charging Too much or too little refrigerant in the lines Loose electrical connections Intermittent power or system shutoffs Faulty line set installation Refrigerant leaks or poor heat transfer When a mini-split is installed correctly, it should run smoothly for years. But when corners get cut or measurements get guessed instead of calculated, you end up with those mini split heat pump problems that show up right away or within the first few months of use. The outdoor unit needs clearance. The indoor unit needs to be level. The refrigerant charge has to be exact. And the electrical connections have to be tight. Miss any of these and you’re looking at troubleshooting that could have been avoided. Problem 1: Mini Split Not Working in Heat Mode You switch your mini-split over to heat mode, wait a few minutes, and nothing happens. No warm air. No change in temperature. Just the same cold room you started with. Mini split not working in heat mode is a frustrating problem, especially in the middle of winter. But before you panic, there are a few things worth checking. Possible causes: What you can try: Start with the simplest fix. Turn off the system and check your air filters. If they’re clogged with dust and pet hair, clean or replace them. Restricted airflow is one of the most common reasons a mini-split struggles to heat. Next, take a look at the outdoor unit. If you see ice coating the coils, your system is having trouble defrosting. Turn it off and let it thaw completely. This can take several hours, so be patient. Once thawed, try running it again and see if the ice returns. If the unit still isn’t heating, the issue might be refrigerant related. How to tell if your mini split is low on refrigerant? Look for these signs: Low refrigerant almost always means there’s a leak somewhere in the system and that’s not a DIY fix. Refrigerant handling requires special certification, and leaks need to be located and sealed before recharging. Call a professional for this one. The mini split temperature sensor could also be the culprit. If the sensor is reading the wrong temperature, your system might think the room is already warm enough and refuse to kick on. A technician can test and replace the sensor if needed. Problem 2: Mini Split Not Blowing Air You set the temperature, hear the unit click on, but nothing comes out of the vents. No air movement at all. Mini split not blowing air usually points to airflow restrictions or fan issues. The most common cause is clogged air filters because when filters get packed with dust, the system senses the restriction and may shut down the fan to protect itself. Pull out the filters and hold them up to the light. If you can’t see through them, they need cleaning. Another possibility is blocked vents. Check that furniture, curtains, or other objects aren’t blocking the indoor unit’s airflow. The outdoor unit also needs clearance, which is why if bushes or debris are crowding it, the system can’t exchange heat properly. Sometimes the issue is mechanical. A failing fan motor or a stuck blower wheel can stop airflow completely. You might hear the unit running but feel nothing at the vent. And that’s a sign something internal has broken, which again is not a DIY fix. Problem 3: Mini Split Keeps Shutting Off Your mini-split runs for a while, then clicks off. A few minutes later, it starts up again. Or maybe it shuts down completely and won’t come back on. Mini split keeps shutting off can mean a few different things. Sometimes it’s normal, systems cycle on and off to maintain temperature. But if it’s happening too often or shutting down completely, something’s wrong. Do mini splits turn off when temperature is reached? Yes, they do. That’s how they’re designed to work. The indoor unit blows air until the room hits your set temperature, then the fan slows or stops. When the room temperature drops or rises past the set point, it kicks back on. That’s normal operation, not a problem. The trouble starts when the unit shuts off well before reaching the set temperature. Possible causes include: Mini split troubleshooting problems like this often require a professional AC technician to diagnose. If your unit is short cycling, start by checking the basics. Clean filters and make sure the outdoor unit isn’t blocked. If those are clear and the problem persists, call for service. Problem 4: Mini Split Not Cooling Properly The system runs, air comes out of the vents, but it’s
10 Wall Oven Fog Patterns That Reveal Seal Damage

Fog inside a wall oven window often appears harmless, yet the shapes and locations of that moisture tell a deeper story about seal health. Small changes in how fog spreads across the glass can reveal early warnings long before the oven stops heating correctly. Once homeowners understand these patterns, spotting seal damage becomes far easier and much safer. This guide explains the ten most common fog patterns and what each one signals, helping readers recognize problems early and decide when professional repair becomes the right move. Why Fog Forms Inside the Wall Oven Glass Fog inside a wall oven window develops when heat escapes through weakened seals and meets cooler air trapped between the glass panels. This temperature clash creates condensation, and the pattern of that condensation often reveals where the seal has started to fail. Once moisture slips past the gasket, it settles in spots that should stay completely dry, indicating that the door no longer holds heat the way it should. Moisture build-up also points to compression loss in the gasket. When the seal no longer presses firmly against the oven frame, steam sneaks outward and spreads across the inner glass. This process usually begins gradually, then becomes more noticeable as the seal weakens. Because heat is escaping at the same time, cooking performance can decline long before the fog becomes obvious. These early clues help homeowners recognize potential trouble before uneven temperatures, longer cook times, or rising energy use start affecting daily cooking. Quick Checklist: When Fog Signals Seal Damage Fog inside a wall oven window can appear in many shapes, but certain patterns almost always connect to seal failure. This quick checklist helps readers confirm whether the moisture they see is harmless or a clear sign of trouble. Visual Clues That Suggest Early Seal Damage Functional Clues Linked to Heat Loss Warning Signs That Require Faster Repair When several clues appear together, the seal usually needs immediate inspection. These quick checks help readers understand the severity before moving into the ten fog patterns explained in the next section. The 10 Fog Patterns That Reveal Seal Damage Fog rarely forms at random. Once moisture begins slipping past a weakened seal, it follows predictable paths across the glass. Each pattern below offers a clue about where the failure started and how serious it may be. 1. Corner Clouding Corner fog usually appears first because steam escapes through one small weakened edge before spreading further. This early-stage pattern often grows wider with repeated oven use, signaling a gradual loss of gasket pressure. 2. Half-Moon Fog Ring Once the door loses perfect alignment, a curved fog patch commonly forms along one side. This half-moon shape reveals that the seal no longer presses evenly, letting moisture rise and settle in a smooth arc. 3. Vertical Streak Fogging Next, moisture may begin sliding downward in vertical lines. These streaks show that steam is escaping through cracks or worn areas in the gasket, then condensing as it travels across the inner surface. 4. Center-Circle Fog Patch When fog gathers in a round patch at the center of the window, the issue usually involves insulation inside the door. This pattern suggests heat is escaping from the middle rather than the edges. 5. Triangle-Shaped Haze If the haze appears in a three-point pattern, the door often has uneven pressure points. This happens when hinges loosen slightly or when someone accidentally forces the door downward, causing the seal to twist. 6. Speckled Moisture Dots Small scattered droplets show that fine steam particles are slipping through narrow gaps. This pattern reflects early deterioration, offering a warning before larger leaks develop. 7. Full-Window Fog Film Once the entire window turns hazy, the seal has likely failed across multiple points. This broad fog layer leads to heat loss, inconsistent cooking, and longer preheat cycles. 8. Random Fog Patches That Shift When fog appears in different spots every time the oven is used, the gasket has usually lost elasticity. This shifting pattern signals widespread leakage rather than one isolated weak point. 9. Fog With Brownish Edges Brown-tinted fog indicates hotter-than-normal air escaping around the seal. The heat pulls food vapors into the condensation, creating discoloration that often points to severe leakage. 10. Fog That Returns Immediately After Use If fog reappears soon after the oven cools, the seal has stopped blocking moisture entirely. This rapid return shows that humidity remains trapped inside because the gasket can no longer form a protective barrier. Fog Pattern Breakdown: What Each One Means Different fog shapes point to different types of seal failure. The table below offers a quick way to compare symptoms, likely causes, and the urgency of repair. This helps homeowners move from observation to action without guessing what the problem might be. Fog Pattern and Likely Seal Issue Fog Pattern Likely Seal Problem Severity Level Repair Needed Corner clouding Localized gasket compression loss Low Monitor or schedule a minor adjustment Half-moon fog ring Door misalignment is creating uneven pressure Medium Professional hinge check recommended Vertical streaks Cracked or worn gasket path Medium Gasket inspection and cleaning Center-circle fog patch Heat loss from the inner panel or the insulation gap High Seal replacement evaluation Triangle-shaped haze Pinched or twisted gasket edge Medium Door realignment and gasket reset Speckled moisture dots Early-stage steam seepage through tiny gaps Low Early repair planning Full-window fog film Widespread seal failure High Full gasket replacement Random shifting patches Loss of elasticity throughout the gasket High Door seal replacement Brown-edged fog High heat escaping and vapor contamination Severe Immediate service required Fast-returning fog Complete seal breakdown Severe Urgent gasket replacement By checking their fog pattern against this chart, readers can understand the severity of the issue before moving into detailed risks and repair steps in the next section. Risks That Come With Delaying Seal Replacement Fog patterns often seem minor at first, yet the consequences of ignoring them can grow quickly. Once the seal weakens, heat begins escaping in ways that affect cooking, efficiency, and long-term appliance
10 Cooktop Repair Tips for Orange Burner Flame

You’re cooking dinner, and instead of a sharp, blue fire, your stove burner is putting out a lazy, orange flame. It looks wrong, and a voice in your head asks, “Why is my gas burner flame orange, and is this actually dangerous?” Well, you’re right to be concerned. An orange flame on your gas stove means the fuel isn’t burning completely. This isn’t just about uneven cooking or a dirty pot bottom; it touches on efficiency and, importantly, safety in your kitchen. A normal gas stove flame is blue, clean and hot, but an orange one hints at a problem which needs a fix. Don’t worry, though. In this guide, we’ll walk through 10 straightforward cooktop repair tips you can try yourself. From simple cleaning to simple adjustments, you’ll learn how to restore that healthy blue fire and cook your favorite meal again. What an Orange Flame Means Think of your gas burner like a tiny, controlled campfire. For a perfect fire, you need the right mix of fuel (the gas) and oxygen (from the air). When this mix is spot-on, you get a clean, hot, blue flame, which is your normal gas stove flame doing its job perfectly. So, what’s with the orange color? That lazy orange flame is a sign of incomplete combustion. In simple terms, the gas isn’t burning all the way through. This can happen for a few common reasons, including not enough air is mixing with the gas, something is dirty and blocking the flow, or there’s an unexpected contaminant in the mix (like excess moisture or dust). Now, to answer the big question whispering in your mind: Is orange flame on gas stove dangerous? It can be. Because the fuel isn’t burning cleanly, it can start producing carbon monoxide, which is a gas you can’t see or smell. It also leaves behind soot on your pots and can make your food cook unevenly. That’s why fixing this isn’t just about appliance upkeep; it’s a key step in keeping your kitchen safe. The good news? The cause is often a simple fix, which is exactly what our ten cooktop repair tips will help you solve. 10 Cooktop Repair Tips Tip 1: Clean Burner Ports and Caps Remember how we said dirt and grease can mess up the air-gas mix? This is where that starts. Over time, spillovers from that boiling pasta pot or general cooking grease clog up the tiny burner ports. These are the little holes around the base of the burner where the flame actually comes out. When they’re blocked, the gas can’t flow evenly and mixes poorly with air, which leads to that cooktop flame orange you’re seeing. Here’s your simple step by step guide: That final step of perfect realignment is very important for a steady, even flame. If the cap is crooked, you’ll still have stove burner flame issues, so take your time. Tip 2: Check Burner Cap Alignment You just learned how important it is to set that cap back perfectly. But what if it was already a little crooked, or got bumped while you were cleaning? This happens to the best of us. A misaligned burner cap doesn’t just sit there looking off; it blocks the flow of gas coming up from the ports. This uneven distribution creates turbulence in your air fuel mixture, which is a fancy way of saying it’s another surefire path to an orange flame. So, how do you check for proper burner alignment? It’s simple. After placing the cap, look at it from eye level. Does it sit perfectly flat and centered on the base? There should be an even, consistent gap all the way around. Give it a gentle wiggle—if it rocks or feels loose, it’s not seated correctly. Sometimes, just lifting it and placing it down again more carefully does the trick. Other times, you might need to check that the burner base itself is properly locked into the cooktop. Getting this small detail right solves many basic stove burner flame issues and is a key part of learning how to fix orange flame on stove problems yourself. Tip 3: Adjust Air Shutter for Proper Combustion Alright, so you’ve cleaned everything and the caps are on straight, but that orange flame is stubborn. This leads us deeper into the “air mix” part of the equation. Many gas burners have a clever little fix built right in: the air shutter. This is a small, sliding metal plate or a ring with openings, usually located right where the burner tube meets the valve, often behind the control knob panel. Its job is to control how much air gets sucked in and mixed with the gas before it ever reaches the burner ports. If this shutter is too closed, your flame is starved for oxygen and will burn yellow or orange. Opening it a bit lets in more air, which can be the final step to restoring that perfect blue flame. A quick, cautious guide (safety first!): Locate It: You may need to gently pull off the control knob and remove a small panel to see the burner tubes. Look for a sliding plate or a slotted ring on the tube. Make a Tiny Adjustment: With the stove OFF, use a screwdriver to slightly loosen the screw holding the shutter in place. Open the shutter just a millimeter or two by sliding or turning it. Test and Observe: Tighten the screw, reassemble, and turn the burner on low. Observe the flame. The goal is a steady blue with perhaps tiny orange tips on blue flame gas stove at the very top, and that’s normal. If it’s still mostly orange, turn it off, let it cool, and open the shutter a tiny bit more. This is a process of fine-tuning. If you’re not comfortable taking things apart, that’s perfectly okay. This tip shows you one of the reasons why your burner flame is orange, and knowing that helps you understand when it might be
7 Unexpected Ways Poor Ductwork Increases Energy Costs

You know that one room in the house? The one that’s freezing in winter and boiling in summer no matter what you do with the thermostat. You’ve probably blamed the windows or cursed the insulation. But here’s a thought. What if the problem isn’t the room at all? Your ductwork is the thing carrying heated and cooled air to every corner of your home. When it’s not working right, neither is your wallet. The thing is, most people don’t realize how much poor ductwork design or damage can cost them month after month. This blog walks through seven ways inefficient ductwork drives up your energy bills without you even noticing. And more importantly, what you can do about it. What is Poor Ductwork and Why It Matters Let’s back up for a second. What do we actually mean when we say poor ductwork? It’s not just one thing. Maybe your ducts are old and falling apart. Maybe they were installed wrong from day one. Maybe a critter decided to move in and made a nest where air should be flowing. Poor HVAC ductwork covers a lot of ground, but it all leads to the same place. Wasted energy and money you shouldn’t have to spend. The usual suspects? Leaks where air escapes before it reaches your rooms. Blockages that strangle airflow. Damaged or leaky ducts that bleed conditioned air into spaces like attics and crawlspaces where nobody lives. And design screwups like ducts that are too small, too long, or bent in ways air was never meant to travel. When your duct system isn’t right, your heating and cooling pay the price. You end up with reduced heating and cooling efficiency because the air struggles to get where it’s going. That means your furnace or AC runs longer, works harder, and burns through more energy just to keep you comfortable. 7 Unexpected Ways Poor Ductwork Increases Energy Costs 1: Reduced Airflow You stand by the vent in your living room and hold up a hand. The air moving through feels weak. Not much pressure. Not much anything really. And that’s not just annoying. It’s expensive. But what is the most common cause of poor air flow in a duct system? Usually it’s one of two things. Either something is blocking the path, or the ducts themselves are too small or poorly designed to move air the way they should. Sometimes it’s both. When airflow drops, your HVAC system doesn’t just give up. It tries harder. It runs longer cycles to push the same amount of air through smaller openings. That means more electricity, more gas, and more wear on parts that cost real money to replace. You might notice it as an uneven temperature in rooms. The bedroom feels fine but the home office is an icebox in winter. Or the opposite. That’s your system telling you the air isn’t getting where it needs to go. The fix isn’t always complicated. Sometimes it’s as simple as clearing blocked vents or replacing a crushed flex duct. But when the problem runs deeper, you’re looking at home duct repair and replacement to get things moving right again. 2: Leaky or Damaged Ducts Remember that feeling when you try to drink from a cup with a hole in it? Annoying, right? Now imagine your heating and cooling dollars pouring out of holes you can’t even see. Becasue that’s exactly what happens with leaky ducts. Here’s a number that might stop you mid-scroll. The Department of Energy says the average home loses 20 to 30 percent of its conditioned air through duct leaks. Let that sink in. Nearly a third of what you pay to heat or cool your home never reaches a single room. It just bleeds out into attics, crawlspaces, and wall cavities where nobody lives. Can duct leaks really increase heating and cooling costs? Absolutely. And by a lot more than most people realize. Where do these leaks hide? Pretty much anywhere ducts connect. Common Leak Locations Why It Matters Seams between duct sections Air escapes before reaching vents Connections at registers Weak airflow at the source Holes or tears in flex duct Constant, invisible energy loss Unsealed joints in attics Conditioned air heats/cools nothing The result? Your system runs longer to make up for what’s lost. That means increased HVAC operating costs month after month, year after year. And because your equipment works overtime, parts wear out faster. Blowers struggle. Motors overheat. Repairs stack up. The fix here is duct sealing and insulation. Not complicated nor crazy expensive. Just sealing up those leaks so the air goes where you actually want it. Through the vents and into your rooms. Not your attic. 3: Poor Duct Design Sometimes the problem isn’t wear and tear. Sometimes it’s how things were set up from day one. You’d think any duct system would be designed to move air efficiently. But builders and installers don’t always get it right. Maybe they took shortcuts. Maybe they just didn’t know better. Either way, you’re the one paying for it every month. What are the results of a poorly designed duct system? Let’s break it down: All of this adds up to one thing. Your system fights itself. The air is lazy. It wants to take the easiest path. When you design ducts that make air work harder, you get pressure loss. And pressure loss means some rooms get too much air while others get hardly any. That’s where that uneven temperature in rooms complaint comes from. The room nearest the unit is comfortable. The one at the end of a long, twisted run? Forget about it. The fix here isn’t always simple. Sometimes it means rerouting ducts or even replacing sections that were installed wrong. But getting the design right transforms how your whole system performs. Less fighting. More flowing. Lower bills. 4: Blockages and Debris You know how your vacuum cleaner works less when the bag is full? Same exact thing happens to your ducts.
Why Furnace Pilot Lights Keep Going Out and How to Fix Them

You wake up shivering. The house is cold. Way colder than it should be. You check the thermostat and sure enough, it’s calling for heat but nothing’s happening. So you head to the basement, pull open the furnace panel, and there it is. That tiny flame you’re supposed to see? Gone. If you’ve been asking yourself why my pilot light keeps going out on my furnace, you’re not alone. It’s one of the most frustrating problems with older heating systems. One day it’s fine. The next, you’re standing there with a lighter wondering what went wrong. This blog walks through the common reasons pilot lights fail, how to spot the culprit, and when it’s time to call someone who actually knows what they’re doing. What a Furnace Pilot Light Does Before we dive into why that little flame keeps disappearing, let’s talk about what it’s actually supposed to do. A pilot light is exactly what it sounds like. A small flame that burns continuously. Its job? To ignite the gas coming out of your furnace burners whenever the thermostat calls for heat. No pilot light means no ignition. No ignition means no heat. If your furnace was made in the last twenty years or so, you probably don’t have a pilot light at all. Most modern systems use electronic ignition instead. But if your furnace is older, that little blue flame is the thing standing between you and a warm house. A standing pilot light needs three things to stay lit. Gas to burn. Clean air to feed the flame. And a thermocouple to keep everything running safely. That thermocouple is a safety device that sits right next to the flame. It senses the heat and tells the gas valve to stay open. If the flame goes out, the thermocouple cools down and shuts off the gas. Prevents your house from filling with unburned gas. So when your pilot light won’t stay lit, something is interfering with one of those three things. Gas isn’t flowing right. Air can’t reach the flame. Or the thermocouple is malfunctioning. What It Means When a Pilot Light Won’t Stay Lit So you’ve confirmed the pilot light keeps going out. Not once. Not twice. It’s becoming a thing. Now what? What does it mean when a pilot light won’t stay lit? In short, your furnace is trying to tell you something is wrong. That little flame doesn’t just die for no reason. Something forced it out or kept it from getting what it needs to keep burning. Here’s what’s happening behind the scenes. Remember that thermocouple we talked about? When the pilot light is on, the thermocouple stays hot and keeps the gas valve open. The moment that flame goes out, the thermocouple cools down. That triggers a furnace safety shutdown and the gas valve closes instantly. No gas flows. It’s a built in protection so your home doesn’t fill with unburned fuel while you’re sleeping or at work. So when you find yourself dealing with furnace pilot light problems, you’re actually dealing with one of a few specific issues. Maybe the thermocouple is dirty or failing. Maybe gas isn’t reaching the pilot consistently. Maybe a draft keeps blowing the flame out. Or maybe the pilot tube itself is clogged with debris. Most Common Causes Your Furnace Pilot Light Keeps Going Out Alright, let’s get into the actual reasons that flame keeps dying on you. We’ll hit each one so you can match your situation to the problem. Thermocouple Failure This is the big one. The thermocouple is that copper rod sitting right next to the pilot flame. Its job is simple. Feel the heat and tell the gas valve to stay open. When a thermocouple gets dirty, bent, or just wears out, it stops sensing heat properly. It might think the flame is out even when it’s not. Or it might fail completely and shut off the gas for no reason. Signs of thermocouple failure include a pilot that lights easily but dies as soon as you release the reset knob. That’s the thermocouple not getting hot enough to stay open. Dirty or Clogged Pilot Tube The pilot tube is the tiny pipe that delivers gas to the pilot flame. It has a small opening that can get clogged with dust, dirt, or carbon buildup over time. When that happens, the flame gets weak. It might burn orange or yellow instead of blue. It might flicker. And eventually, it just gives up and goes out. A dirty or clogged pilot tube is one of the easiest problems to fix. A little cleaning with compressed air or a thin wire can sometimes get things flowing again. Gas Supply Issues Your pilot light needs a steady stream of gas to keep burning. If something interrupts that flow, the flame dies. Gas supply issues can mean a few different things. Maybe your gas valve is partially closed. Maybe the pressure is too low. Maybe there’s air in the line from recent work. Or maybe you’re just running low on propane if that’s what you use. Check other gas appliances in the house. If they’re working fine, the issue is likely specific to your furnace. Draft or Ventilation Problems Sometimes the problem isn’t the furnace. It’s the air moving around it. A strong draft from an open basement door, a leaky window, or even a powerful exhaust fan can blow out a pilot light. The flame is small. It doesn’t take much wind to snuff it out. Draft or ventilation problems can also work the other way. If your furnace isn’t getting enough combustion air, the flame can suffocate and die. It needs oxygen to burn. Weak or Inconsistent Flame Take a look at your pilot flame when it’s actually lit. What color is it? How strong does it look? A healthy pilot flame burns bright blue. It’s steady. It stands up straight. If your flame is yellow, orange, flickering, or leaning to one side, that’s a